Ever noticed those tiny scratches or dull spots on your car’s paint that just won’t go away no matter how much you wash it? It’s frustrating, right? That’s where the Paint Correction Process comes in. This special method can remove those imperfections and bring back the shiny, flawless finish your car once had. In this blog post, we’ll break down what the c is, why it’s important, and how it can completely transform your vehicle. By the end, you’ll know exactly how this process works and why it’s the secret to making your car look like new again. Let’s dive in!
Table of Contents
ToggleWhat is Paint Correction?
So, what exactly is the Paint Correction Process? Imagine your car’s paint is like your skin. Over time, it gets tiny scratches, blemishes, and even dull spots from dirt, sun, and other things in the environment. The Paint Correction Process is like a special treatment that removes all these tiny scratches and imperfections from your car’s paint surface. It’s a way of making the paint look smooth and shiny again.
You might be wondering why these scratches happen in the first place. Well, most of the time, it’s from washing your car the wrong way, dirt sticking to the surface, or even bird droppings. Even small things like tree sap or road salt can damage the paint. That’s why the Paint Correction Process is so important. It fixes all these problems and makes your car look like it just rolled out of the showroom.
The process involves using special tools and products to carefully polish the paint and remove a thin layer of the damaged surface. Don’t worry—it doesn’t harm the paint. Instead, it reveals a fresh, shiny layer underneath, making your car look fantastic!
Why is Paint Correction Important?
Now that you know what the Paint Correction Process is, let’s talk about why it’s important. Imagine you have a favorite toy, but it’s all scratched up. It doesn’t look as nice as it used to, right? The same thing happens to your car. Scratches and swirl marks can make your car look old and dull, even if you wash it regularly.
Here’s why the Paint Correction Process is a game-changer:
- Brings Back the Shine: When your car’s paint is corrected, it looks shiny and new again. It’s like giving your car a fresh coat of paint without actually repainting it.
- Protects the Paint: By removing scratches and other imperfections, the paint surface becomes smooth again. This helps protect the paint from further damage.
- Increases Resale Value: If you ever decide to sell your car, a shiny, well-maintained paint job can help you get a better price. It shows that you took good care of your vehicle.
- Makes Your Car Look Amazing: Let’s be honest—everyone loves a car that looks clean and shiny. The Paint Correction Process makes your car look its best, making you feel proud every time you drive it.
The Paint Correction Process: Step-by-Step
Let’s go through the Paint Correction Process step by step so you can see what happens during this amazing transformation.
1. Assessment and Preparation
Before we start, the first step is to carefully look at the car’s paint to see where the scratches and imperfections are. This is called an assessment. It helps us understand how much work is needed and what tools to use.
Next, we need to wash the car thoroughly. This step is super important because it removes all the dirt and dust from the surface. If we skip this step, the dirt could scratch the paint even more when we start polishing.
2. Claying: Removing Contaminants
After the car is washed, the next step in the Paint Correction Process is called “claying.” Now, you might be wondering what claying is. Don’t worry, it’s pretty simple! Think of it as giving your car’s paint a deep clean, like scrubbing away stubborn dirt that won’t come off with regular washing.
In this step, we use a special tool called a clay bar. The clay bar feels like soft putty, and it’s used to gently glide over the car’s paint. As it moves, it picks up tiny particles of dirt, dust, and other things that stick to the paint surface. These are called bonded contaminants, and they can be hard to see, but they make the paint feel rough.
Why is claying important in the Paint Correction Process? Because if we skip this step, the tiny bits of dirt could scratch the paint when we start polishing. By using the clay bar, we make sure the paint is smooth and clean, ready for the next steps.
It’s like cleaning a window before you polish it—you want it to be spotless so the polish works its magic!
3. Compounding: Removing Deep Scratches
Now that the paint is clean and smooth, we move on to the next step of the Paint Correction Process, which is called “compounding.” This is where we get rid of the deeper scratches and swirl marks.
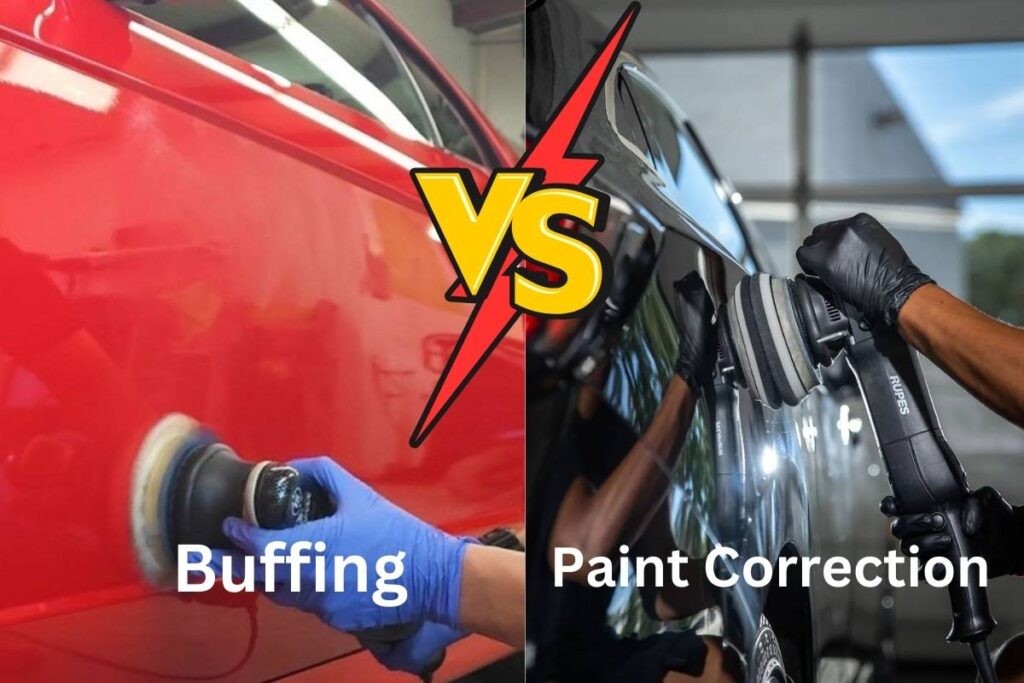
Compounding uses a special product called a compound. This is a thick liquid with tiny particles that help buff out the scratches. Imagine you have a scratch on your favorite toy, and you rub it gently with a soft cloth until the scratch is gone. Compounding works in a similar way. It smooths out the rough spots on the paint, removing the scratches layer by layer.
We use a tool called a buffer, which is like a spinning pad, to apply the compound evenly. The buffer moves quickly but gently over the paint. It’s important to use just the right amount of pressure. Too little pressure, and the scratches won’t come out; too much pressure, and it could damage the paint. That’s why it’s best to leave this part of the Paint Correction Process to a professional who knows how to do it safely.
Once the compounding is done, the paint already looks a lot better, but it’s not finished yet. There might still be some fine scratches left behind. That’s where polishing comes in, and it’s the next step in the process.
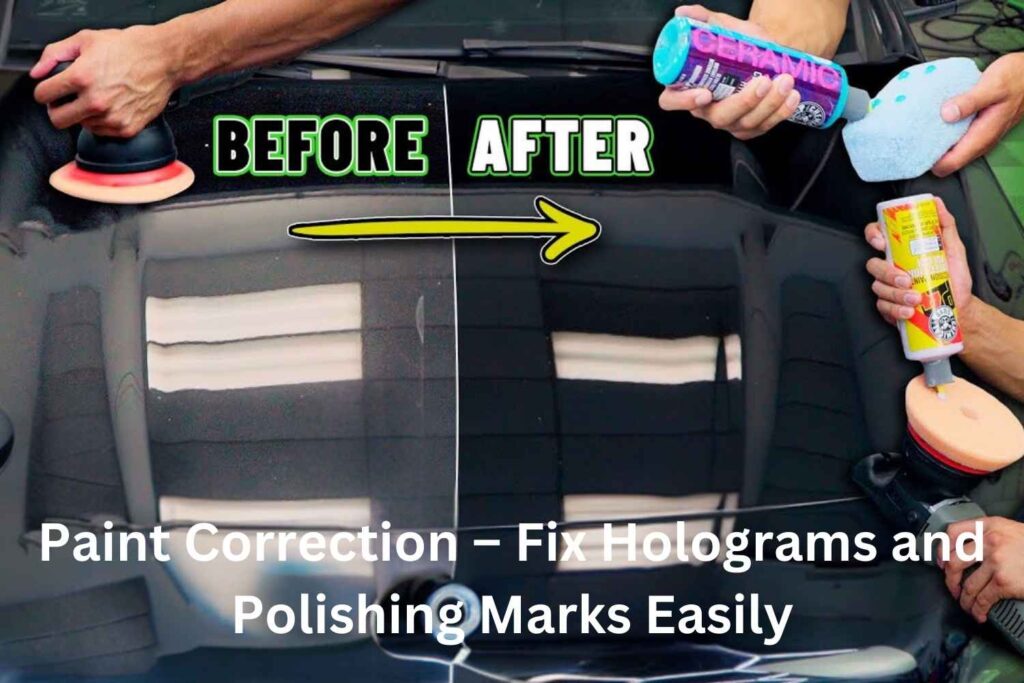
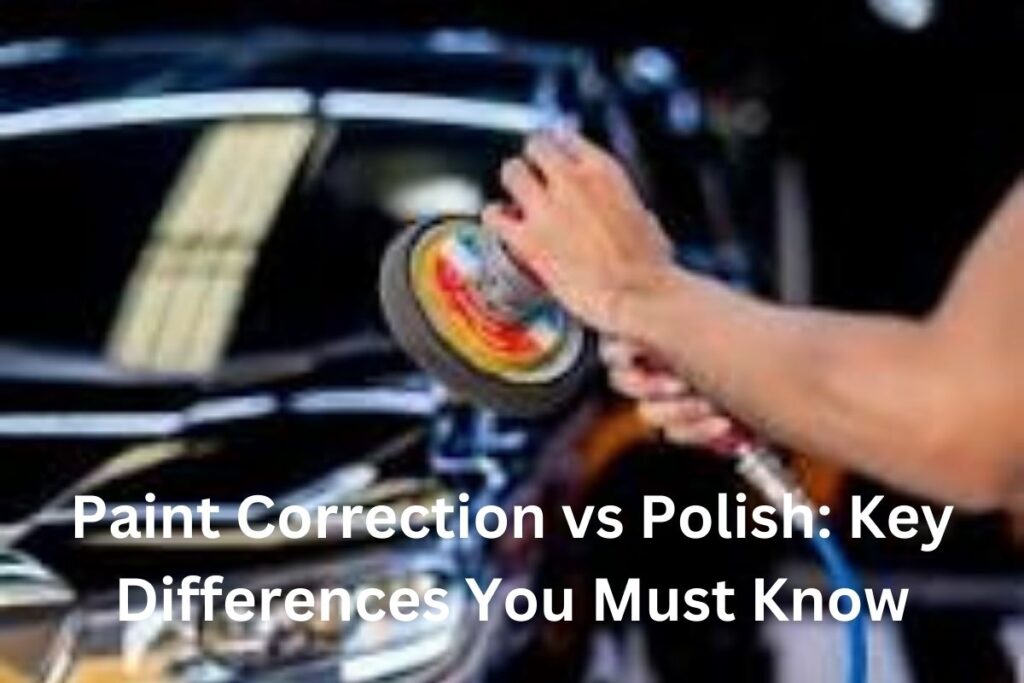
4. Polishing: Making the Paint Shine
Polishing is like the final touch in the Paint Correction Process. After removing the deep scratches with compounding, polishing helps to refine the paint and make it shine. Think of it like brushing your hair after you’ve washed it—it’s the finishing touch that makes everything look smooth and shiny.
During polishing, we use a different product called polish, which is finer than the compound. It’s like a gentle cream that smooths out any tiny scratches left behind after compounding. We use the buffer again, but this time with a softer pad, to gently polish the paint.
Polishing brings back the gloss and clarity of the paint. It’s the part that makes your car look new and shiny, like a mirror. When you look at the paint after polishing, you should be able to see your reflection clearly. This is when you know the Paint Correction Process is working well.
5. Finishing: Protecting the Paint
We’re almost at the end of the Paint Correction Process, but there’s one final step that’s super important. After all the polishing, the paint looks shiny and beautiful. Now, we need to protect it so it stays that way for a long time. This step is called “finishing.”
In the finishing stage, we apply a special protective layer over the paint. There are a few different products we can use, like wax, sealant, or even a ceramic coating. Each of these products helps shield the paint from dirt, water, and other things that could damage it.
Wax is like a smooth, creamy lotion that we spread over the paint. It gives the car a nice glossy look and helps water slide off easily. Sealant is a bit stronger and lasts longer than wax. It’s a synthetic product that creates a tough barrier on the paint. Then there’s ceramic coating, which is the strongest option. It’s like a glass shield that can last for years, protecting the paint from scratches, UV rays, and bird droppings.
Applying this protective layer is like putting on sunscreen before going to the beach. It keeps your car safe from the elements and helps maintain the results of the Paint Correction Process.
With the finishing step complete, your car’s paint looks amazing and is now protected from future damage. It’s shiny, smooth, and ready to show off!
DIY Paint Correction vs. Professional Services
You might be thinking, “Can I do the Paint Correction Process myself, or should I hire a professional?” That’s a great question! Let’s talk about the difference between doing it yourself and getting help from a pro.
DIY Paint Correction
Doing the Paint Correction Process yourself can be fun if you love working on your car. It’s also cheaper since you don’t have to pay for professional services. However, it’s not as easy as it looks. You need special tools like a buffer and products like compound and polish. You also need to be careful not to press too hard, or you might make the scratches worse.
DIY paint correction can be a good choice for small scratches or if you like to learn new things. But it does take time, patience, and the right skills.
Professional Paint Correction Services
On the other hand, a professional knows exactly how to do the Paint Correction Process the right way. They have years of experience and the best tools for the job. They can remove even deep scratches without damaging the paint. Plus, they can finish the job faster than if you were doing it yourself.
Yes, hiring a professional costs more, but you get high-quality results and peace of mind. If you want your car to look its absolute best, it’s usually worth it to leave the job to the experts.
In short, if you’re confident and have the tools, DIY might be fun for small jobs. But for serious paint correction, I recommend going with a professional. They know exactly what to do to make your car shine.
How to Choose a Professional Paint Correction Service
Now that you know about the Paint Correction Process, you might be thinking about getting it done for your car. But how do you find the right place to do it? Choosing a good service is important because you want the best care for your car. Let’s go over a few simple steps to help you pick the right professional.
1. Do Your Research
First, it’s a good idea to do a little research. Look up local car detailing shops online and read their reviews. What do other customers say about their services? If most people are happy with the results, it’s a good sign that the shop does a great job with the Paint Correction Process.
2. Check Their Experience
Experience matters a lot in the Paint Correction Process. You want someone who has done this many times before and knows how to handle all types of paint and scratches. A good professional will know exactly which products and tools to use for your car’s specific paint type. Don’t be afraid to ask how long they’ve been in business and if they have experience with cars like yours.
3. Look at Their Work
A great way to see if they do quality work is to ask for before-and-after photos. Many detailing shops will have pictures of cars they’ve worked on. This way, you can see the results of their Paint Correction Process and decide if it’s what you’re looking for. If the cars look shiny and new after the process, you know they’re doing it right.
4. Ask About Their Services
Different shops might offer different levels of service. Some might just do basic polishing, while others provide a complete Paint Correction Process, including claying, compounding, polishing, and finishing. Make sure you know what is included in the service, so there are no surprises. It’s also helpful to ask about the types of products they use. High-quality products will give better results and protect your car’s paint for a longer time.
5. Get a Quote
Finally, ask for a price quote. The cost of the Paint Correction Process can vary depending on how much work your car needs and the quality of the products used. While it’s good to find a fair price, remember that cheaper isn’t always better. Sometimes paying a little more means getting better service and results that last longer.
By following these simple steps, you can find a professional service that will take great care of your car and give you the best results with the Paint Correction Process.
Maintaining Your Vehicle After the Paint Correction Process
Congratulations! If you’ve completed the Paint Correction Process, your car is now looking shiny and new. But the job isn’t done yet. To keep your car looking this good, you need to take care of it properly. Here are some easy steps you can follow to maintain your car’s fresh look after the Paint Correction Process.
1. Regular Washing
The best way to keep your car looking great is to wash it regularly. But don’t just use any old sponge and soap. It’s important to use a soft microfiber towel and a gentle, car-specific shampoo. This way, you won’t scratch the paint. Be sure to wash your car in the shade or early in the morning. Washing it in the hot sun can leave water spots, which might ruin all the hard work from the Paint Correction Process.
2. Use a Protective Coating
After the Paint Correction Process, the paint is smooth and clear. To keep it that way, you should apply a protective coating. This could be a layer of wax, sealant, or ceramic coating. Wax is like a quick fix that gives your car a nice shine and lasts a few weeks. Sealant is stronger and can protect the paint for several months. Ceramic coating is the best option because it acts like a glass shield, protecting the paint for up to a year or more.
These coatings help water, dirt, and dust slide off the surface, keeping the paint cleaner for longer. It’s like giving your car a raincoat!
3. Safe Parking
Where you park your car can make a big difference in how well the Paint Correction Process holds up. Try to avoid parking under trees, as bird droppings and tree sap can damage the paint. If you can, park your car in a garage or under a car cover. This protects the paint from the sun’s harsh UV rays, which can fade the color over time.
4. Regular Inspections
Take a few minutes each month to check the paint for any new scratches or marks. If you spot something early, it’s easier to fix before it gets worse. Keeping an eye on your car’s paint helps you maintain the results of the Paint Correction Process and keeps your car looking its best.
4. Avoid Automated Car Washes
It might seem convenient to use an automated car wash, but it’s not a good idea if you want to protect your paint. The big brushes in these car washes can create new swirl marks and scratches. Instead, hand-wash your car or visit a professional car wash that uses soft, touch-free methods.
By following these simple steps, you can make sure the results of the Paint Correction Process last a long time. Your car will stay shiny and smooth, and you’ll be proud every time you take it out for a drive!
Conclusion
In this guide, we’ve learned all about the Paint Correction Process. It’s a powerful way to make your car look shiny and new by removing scratches and imperfections from the paint. Whether you choose to do it yourself or hire a professional, this process can transform your car’s appearance and protect it for a long time.
Remember, keeping your car’s paint in good shape isn’t just about looks—it also helps protect the value of your car. So, if you’ve noticed scratches or dull spots on your vehicle, the Paint Correction Process could be the perfect solution.
Thanks for reading, and I hope you found this guide helpful. If you have any more questions or need help getting started, don’t hesitate to reach out. Your car deserves the best care, and with the Paint Correction Process, it can look amazing every time you hit the road!
Frequently Asked Questions (FAQs)
What exactly is the Paint Correction Process, and how does it work?
The Paint Correction Process is a method used to fix imperfections in your car’s paint, like scratches, swirl marks, and dull spots. It involves cleaning, using a clay bar, compounding to remove scratches, and polishing to make the paint shiny again. This process brings back the car’s original, smooth finish.
How do I know if my car needs the Paint Correction Process?
If you notice small scratches, swirl marks, or if your car’s paint looks dull even after washing, it might need paint correction. Run your fingers over the paint—if it feels rough or bumpy, it could benefit from this process.
Can paint correction remove all types of scratches from my car?
No, the Paint Correction Process can fix light scratches, swirl marks, and surface imperfections. However, very deep scratches that go through the clear coat or color coat may not be fully removed. In such cases, repainting might be necessary.
Is the Paint Correction Process safe for all types of car paint?
Yes, when done correctly by a professional, the Paint Correction Process is safe for most types of car paint, including clear coats. It requires careful handling and the right tools to avoid causing any damage.
How long do the results of the Paint Correction Process typically last?
The results can last anywhere from several months to a few years, depending on how well you take care of your car. Regular washing, applying a protective wax or sealant, and avoiding scratches can help maintain the shine for a longer time.
Disclaimer
The Paint Correction Process involves the use of specialized tools, products, and techniques that can be complex and require experience. Attempting this process without proper training may lead to further damage to your vehicle’s paint. It’s recommended to consult with a professional detailing service for the best results and to avoid potential risks. Always follow safety guidelines and use the correct products to protect your car’s finish.