
Have you ever looked at your car and wondered why its once shiny paint now looks dull, scratched, or faded? What if there was a way to restore that showroom finish without an expensive new paint job? This is where paint correction comes in.
Whether it’s swirl marks from car washes, light scratches from road debris, or even damage caused by the sun’s UV rays, your vehicle’s paint can take quite a beating over time. But can these imperfections be fixed? And more importantly, can you bring back that glossy, smooth look yourself, or is it best left to the professionals?
In this blog post, we’ll dive deep into the world of paint correction—explaining what it is, how it works, and whether it’s something you can tackle on your own. If you’ve ever wondered what goes into making your car’s paint look new again, you’re in the right place. Keep reading to discover how you can remove imperfections, restore your car’s shine, and protect it for the long haul.
What is Paint Correction?
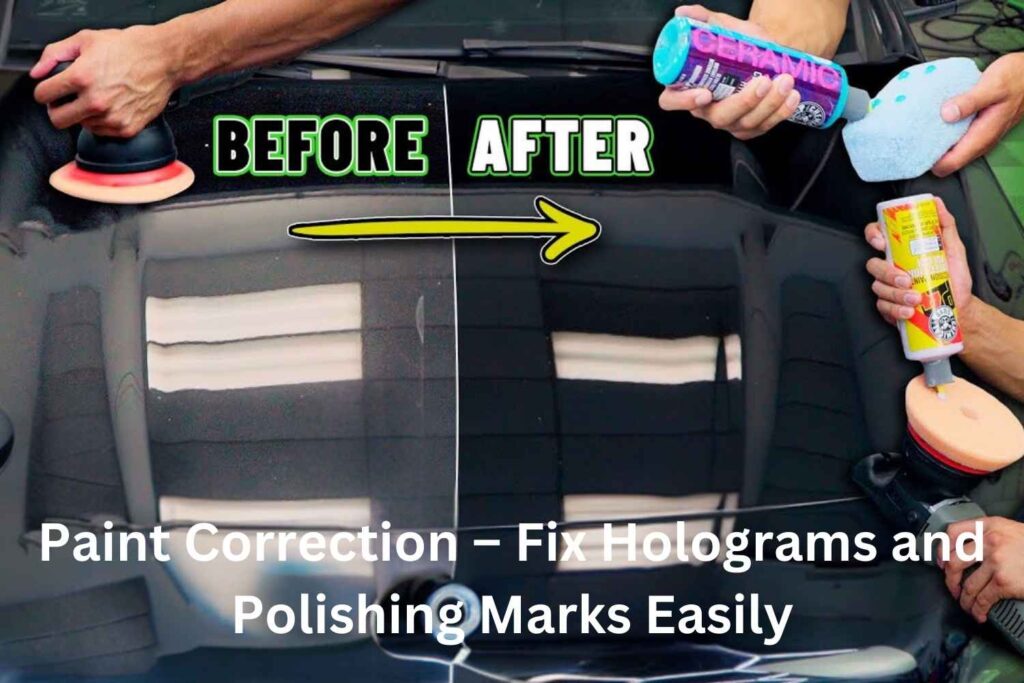
Paint correction removes flaws from a car’s paint. These flaws include swirl marks, scratches, water spots, and even fading from the sun. Over time, your car’s paint wears down. Even washing it can leave small scratches that dull the surface.
Paint correction uses special tools like polishers and compounds to smooth out these flaws. When done right, it makes the paint look new again, bringing back that deep, shiny gloss.
How Does Paint Correction Work?
There are several steps to paint correction. First, the car is cleaned to remove dirt and other particles. Then, a machine polisher is used with compounds to remove tiny layers of the clear coat. This gets rid of the scratches and swirls, revealing smooth paint underneath.
The goal is to remove flaws without harming the paint. This method can fix light swirl marks and even deeper scratches, depending on the damage. Experts may use different techniques for different types of scratches.
Why is Paint Correction Important?
- Restoring the car’s look: The paint is the first thing people notice. A shiny car catches attention. Paint correction can bring back that smooth, fresh look.
- Keeping the car’s value: Whether you sell your car or keep it, good paint keeps its value. Cars with scratched or faded paint lose value faster. A well-maintained car will always be worth more.
- Enhancing protection: After paint correction, you can add protective coatings like ceramic or paint protection film (PPF). These protect the fresh paint and make it easier to care for.
Paint correction isn’t just for fancy cars. It’s for anyone who wants their car to look great. From daily drivers to weekend rides, fixing the paint makes a big difference. After correcting the paint, it’s easier to keep your car looking its best, especially with protective coatings.
How Do You Know If Your Car Needs Paint Correction?
It can be hard to spot problems with your car’s paint unless you look closely. But there are a few signs that your car’s paint might need some work.
Common Signs to Look For:
- Swirl Marks and Small Scratches: These tiny scratches often happen when your car is washed the wrong way. Dirty cloths or washing without enough water can cause these marks. They show up clearly in sunlight or under bright lights. If you see small scratches in circles, your car may need paint correction.
- Faded or Dull Paint: Over time, the sun can make the paint fade and lose its shine. If your car’s color looks less bright or chalky in spots, it might be faded. Paint correction can help bring back the shine.
- Water Spots and Bird Droppings: Water can leave spots on your car when it dries. Bird droppings are even worse because they can eat away at the paint. Both of these can leave marks that paint correction can fix.
How to Check Your Car for Paint Problems:
- Use the Right Light: Look at your car under bright light or in the sun. This helps you see scratches and swirl marks. Shine a light from different angles to see any problems with the paint.
- Feel the Surface: After washing your car, run your hand over the paint. If it feels rough, there may be dirt or other stuff on it. This can be fixed with a clay bar, and if there are scratches, paint correction may be needed.
- Look for Dull Areas: Stand back and look at your car. Are some parts duller than others? These areas may need paint correction to get the shine back.
By checking for these signs, you can decide if paint correction is needed to keep your car looking great.
Understanding How Paint Correction Works
To understand paint correction, you need to know about the layers of paint on your car. Car paint isn’t just one layer of color. There are several layers that work together to give your car a shiny and protective finish.
Layers of Car Paint:
- Clear Coat: This is the top layer of your car’s paint. It is a clear layer that adds shine and protects your car from the sun, dirt, and other things. The clear coat is thin, about 1.5 to 2 mils thick (a mil is one-thousandth of an inch).
- Base Coat: Under the clear coat is the base coat. This layer gives your car its color, like red, black, or blue. It doesn’t protect the car, but it makes it look nice.
- Primer: The primer is below the base coat. It helps the color stick to the car and stops the metal from rusting.
- Metal: At the bottom is the car’s metal body. This is what all the other layers sit on.
How Paint Problems Happen:
- Swirl Marks and Scratches: These small marks are usually found in the clear coat. Since it is the top layer, it gets scratched easily, especially if the car is washed wrong.
- Deeper Scratches: If a scratch goes through the clear coat and into the base coat, it’s harder to fix. You might need touch-up paint or even a repaint.
- Fading and Oxidation: The sun’s rays can cause the clear coat to lose its shine. This is why paint can fade or look dull over time.
Why Paint Correction Targets the Clear Coat:
Paint correction smooths and polishes the clear coat. It removes a tiny part of the clear coat to get rid of marks and scratches. Once this damaged layer is gone, your car looks shiny and smooth again.
But paint correction doesn’t fix deep scratches that go into the base coat or primer. For those, you may need touch-up paint or a new paint job.
Step-by-Step Guide to Paint Correction.
Now that we know what paint correction is, let’s learn how to do it. Whether you want to do it yourself or get it done by a pro, knowing the steps will help you get the best results.
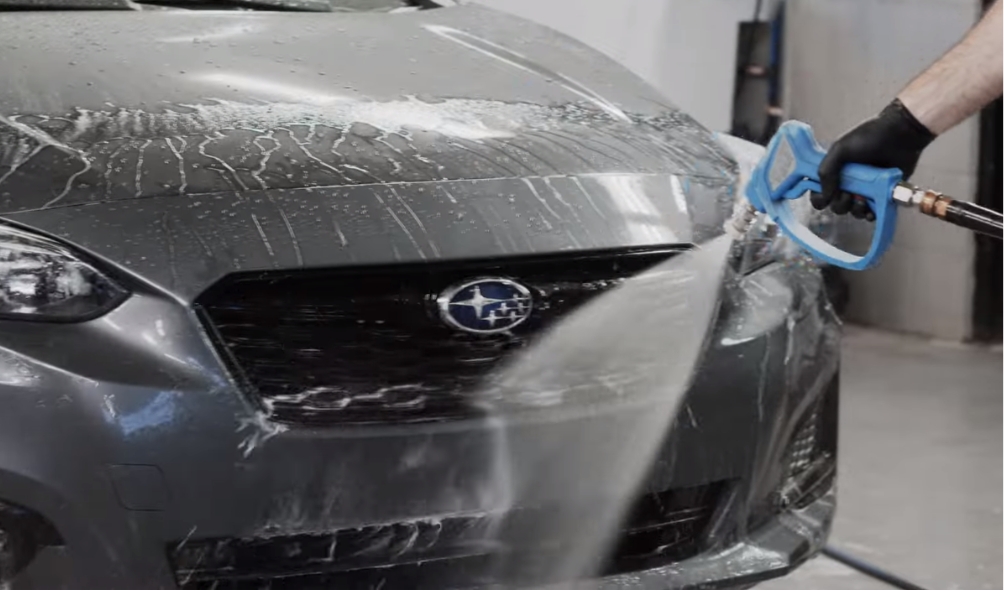
Step 1: Wash and Clean the Car
Before fixing the paint, make sure your car is clean. Dirt and grime can cause more scratches if not removed.
- Wash the car: Use the two-bucket method. One bucket is for soapy water, and the other is for rinsing. This keeps dirt from going back on the car.
- Use a clay bar: After washing, use a clay bar to remove sticky stuff like sap or tar. This will make the paint smooth and ready for polishing.
Step 2: Check the Paint
Once the car is clean, inspect the paint. This will help you see any damage.
- Use inspection lights: Use LED or halogen lights to see scratches or swirl marks. Look at the paint from different angles.
- Check the damage: Decide if the paint has light marks or deeper scratches. This will help you choose the right tools.
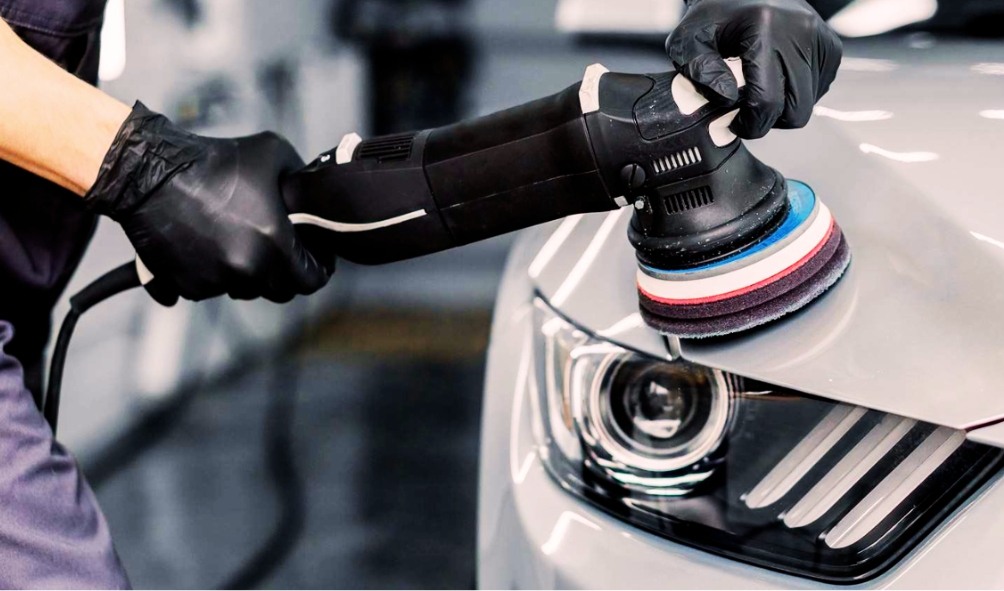
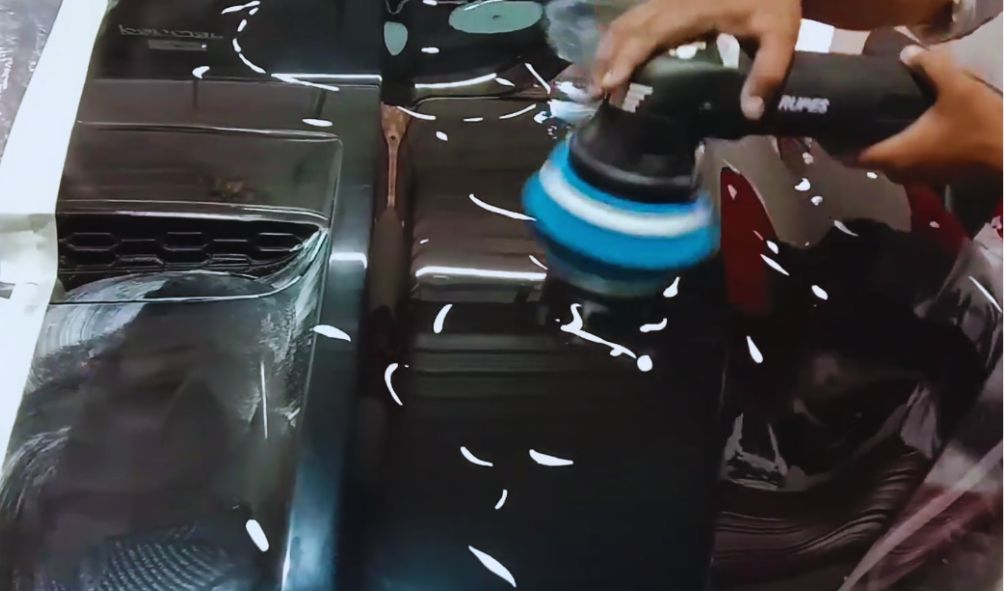
Step 3: Pick the Right Tools
You’ll need a few tools for paint correction.
- Polishers: There are two types: rotary and dual-action (DA). DA polishers are easier for beginners and less likely to damage the paint. Rotary polishers are stronger but need more skill.
- Polishing pads: Use cutting pads for deeper scratches and soft pads for finishing.
- Polishing compounds: Choose the right compound for the level of damage, from heavy to light.
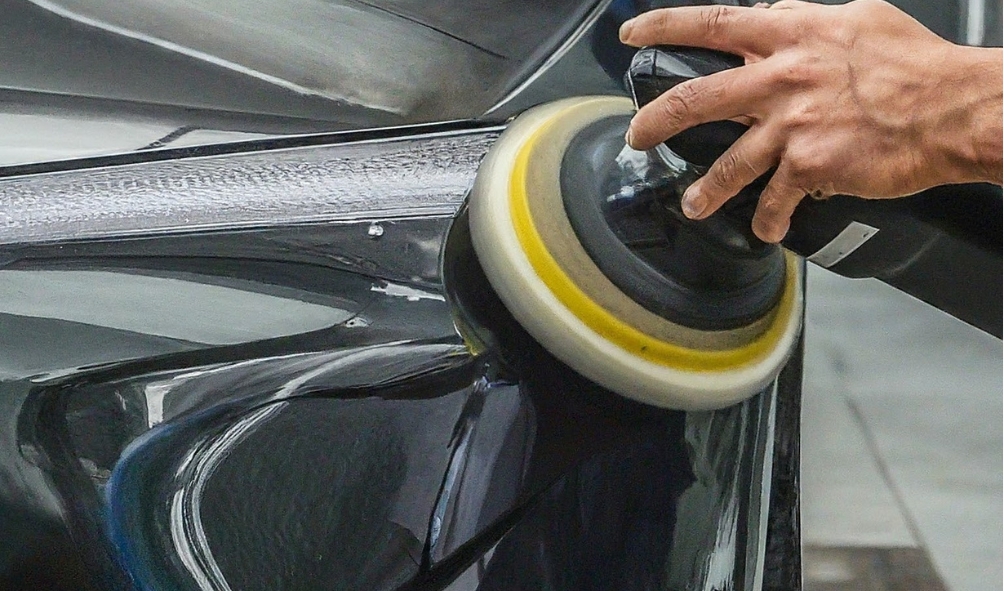
Step 4: Do the Paint Correction
Now that your car is clean and inspected, it’s time to polish the paint.
- Apply the compound: Put a small amount of polish on the pad. Don’t use too much.
- Polish the paint: Move the polisher slowly in an overlapping pattern. This helps cover the paint evenly.
- Check your progress: Wipe off the polish and check if the marks are gone. If not, repeat the process or use a stronger compound.
Step 5: Finish the Job
After the paint is corrected, bring out the shine.
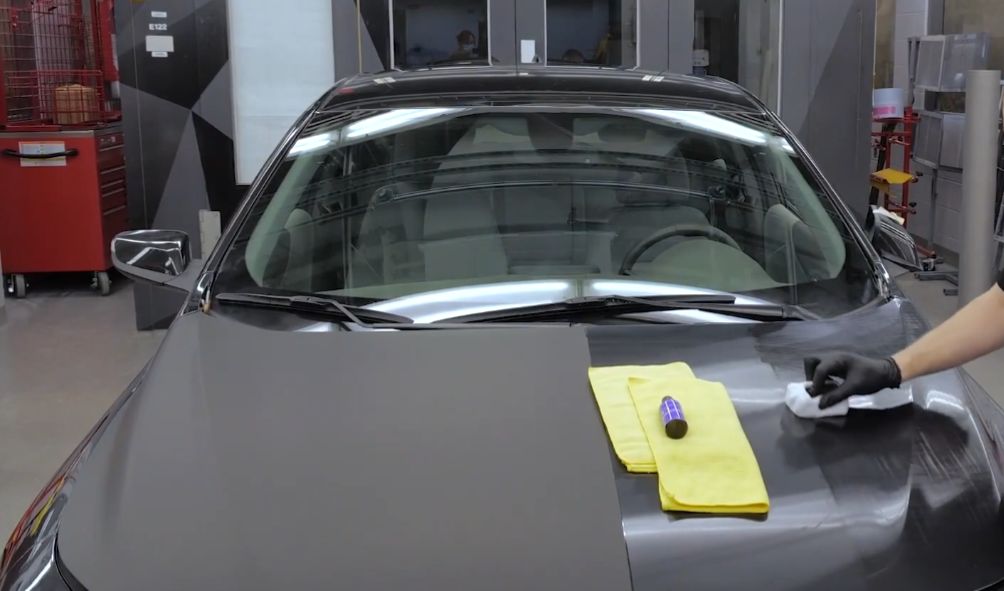
- Use finishing polish: A softer pad and lighter polish will smooth the paint and make it glossy.
- Seal the paint: After polishing, protect the paint with wax or a ceramic coating.
Types of Paint Imperfections and How Paint Correction Addresses Them
There are different types of paint imperfections that can appear on your car over time. Each type needs a slightly different fix during paint correction. Let’s look at the most common paint defects and how to correct them.
Swirl Marks
Swirl marks are tiny scratches in the paint. They happen when the car is washed the wrong way, like using dirty rags or not enough water.
- How to fix swirl marks: Use a dual-action polisher and a medium polish. Gently work the polish into the clear coat to smooth out the tiny scratches.
Scratches
Scratches can be small or deep. It’s important to know how deep a scratch is before trying to fix it.
- Light scratches: These only affect the clear coat. You can fix them with a cutting polish and a polishing machine to smooth the clear coat.
- Deep scratches: If a scratch goes past the clear coat, paint correction won’t fix it. You may need to use touch-up paint or get it professionally repainted.
- How to check the depth: Run your fingernail over the scratch. If it catches, the scratch is deep and needs more than just polishing.
Oxidation and Fading
Sunlight can cause your car’s paint to oxidize over time. This makes the paint look dull and faded. Fading happens when the sun makes the paint lose its color.
- How to fix oxidation and fading: For light oxidation, use a polish to remove the damaged clear coat and restore shine. For heavy oxidation, you may need a stronger polish or professional help. Applying wax or a ceramic coating can help stop future damage.
Water Spots and Acid Rain Damage
Water spots are caused by minerals left behind when water dries on your car. Acid rain can leave marks that are harder to remove.
- How to fix water spots and acid rain damage: Light water spots can be cleaned with polish or water spot remover. Acid rain damage may need more polishing with a cutting compound to remove the etched layer of the clear coat.
By knowing the different types of paint imperfections, you can choose the right fix. This helps keep your car’s paint looking great.
Paint Correction for Beginners: DIY vs Professional Services
If you’re new to paint correction, you might wonder whether to do it yourself or hire a professional. Both options have pros and cons. Your choice depends on how confident you feel, the tools you have, and how damaged your car’s paint is.
When to Do Paint Correction Yourself
If your car only has light swirl marks or small scratches, you can likely fix it yourself with the right tools and some patience. Here’s what to know if you plan to do it yourself:
- Tools: You’ll need some basic tools like a dual-action polisher, polishing pads, and different polishing compounds. You can buy kits online that include everything.
- Time: DIY paint correction takes time, especially if you’re new to it. Plan to spend a few hours on one small area of the car.
- Learning curve: Paint correction is possible at home, but it takes practice. If you’re not careful, you could damage the clear coat or polish unevenly.
Pros of DIY Paint Correction:
- Cheaper: Doing it yourself saves money because professional services can be costly.
- Rewarding: It feels good to work on your car and see the results.
Cons of DIY Paint Correction:
- Risk of damage: If you lack experience, you could cause more harm than good.
- Takes time: Learning the process and doing it right, especially on a big car, can be slow.
When to Hire a Professional
For serious damage, like deep scratches, oxidation, or heavy swirl marks, it’s better to go to a professional. They have advanced tools and high-quality products that you may not have at home. They can handle complex paint issues.
Why Choose a Professional?
- Expertise: They know how to assess the damage and use the right tools and techniques.
- Better equipment: Professionals use high-end polishers and compounds. They also know how to use them safely.
- Guaranteed results: Professionals offer consistent, high-quality results. Many provide warranties or guarantees, so if something goes wrong, they’ll fix it.
Cost Comparison: DIY vs. Professional Paint Correction
- DIY Paint Correction: The cost of tools and products for DIY correction can range from $100 to $300. Once you have the tools, you can use them again on other cars.
- Professional Paint Correction: This service can cost $500 to $1,500 or more, depending on how much work is needed and the size of the car. It often includes extras like waxing or ceramic coating.
Pros and Cons of DIY Paint Correction
Pros:
- It’s cheaper if you already have the tools.
- It’s satisfying to learn and do the work yourself.
- It’s good for light scratches and small problems.
Cons:
- You might make mistakes that damage the clear coat.
- It takes a lot of time, especially for beginners.
- You need to invest in tools upfront.
When to Hire a Professional
- Deep scratches: If the damage is too much for DIY products to fix, it’s best to hire a professional.
- Lack of experience: If you’re unsure about the process, it’s safer to let a pro do it.
- Time limits: If you don’t have hours to spend on paint correction, professionals will do it faster and better.
Ceramic Coating After Paint Correction
After finishing paint correction, the next step is to protect your work. This is where ceramic coating helps. Adding a ceramic coating over your polished paint will keep it shiny for months or even years.
What is Ceramic Coating?
Ceramic coating is a liquid that goes on the surface of your car. It bonds with the clear coat, forming a layer that protects your car from the weather.
Unlike wax, which wears off in weeks, ceramic coating lasts much longer—up to 2-3 years with proper care. It protects your paint from UV rays, water spots, bird droppings, and light scratches.
How Ceramic Coating Helps Paint Correction
Once your car’s paint is corrected, you’ll want to keep it looking great for as long as possible. A ceramic coating helps by adding a strong protective layer.
- Seals the shine: The shiny finish you created with paint correction stays protected.
- Easier cleaning: With ceramic coating, dirt and water slide off easily. You’ll spend less time washing your car, and it stays clean longer.
Application: DIY or Professional?
You can apply ceramic coating yourself, but it takes care and patience. Many DIY kits are available, but you must apply it evenly for the best results. If you’re unsure, consider hiring a professional.
- DIY Ceramic Coating: Kits cost between $50 and $150. You’ll need a clean space to apply it. Follow the instructions closely to avoid streaks.
- Professional Ceramic Coating: Professional services cost from $500 to $2,000, depending on the brand and the size of your car. The benefit is that professionals apply the coating evenly in a controlled space. They often provide warranties that last for a set time.
Popular Ceramic Coating Products
Here are some top ceramic coatings, whether you plan to DIY or hire a pro:
- CarPro CQuartz: Known for long-lasting protection and shine. Popular among DIYers for its ease of use and pro-level results.
- Gtechniq Crystal Serum: Available in both consumer and pro versions. It’s known for its toughness and protection against swirl marks and damage.
- Adam’s Ceramic Coating Kit: A great DIY kit that includes everything you need to apply the coating at home. It offers strong protection for daily drivers.
- Gyeon Quartz: A high-end ceramic coating used by both detailers and car lovers. It offers top protection.
By applying ceramic coating after paint correction, you can keep that deep, glossy shine for a long time. Plus, it protects your car’s paint from the elements.
Teflon Coating vs Ceramic Coating for Paint Protection
When you want to protect your car’s paint after correction, you have two main choices: Teflon or ceramic coating. Both help keep your car safe, but they work in different ways.
What Is Teflon Coating?
Teflon coating is a type of plastic that makes your car’s paint smooth. This keeps dirt, water, and small scratches away. Teflon is cheaper than ceramic coating, and detailers often use it because it’s quick and easy.
But Teflon doesn’t last long. It wears off in a few months, while ceramic coating can last for years. This means you’ll need to reapply Teflon regularly.
Teflon vs. Ceramic Coating
Here’s a quick look at the main differences between Teflon vs ceramic coatings:
- Durability: Ceramic coatings last for 2-3 years or longer. Teflon only lasts 6 months to a year, so you’ll need to apply it more often.
- Protection: Ceramic coatings protect better from UV rays, water spots, and scratches. Teflon offers basic protection but won’t resist damage as well.
- Cost: Teflon is cheaper, costing about $50 to $100. Ceramic is more expensive, ranging from $500 to $2,000, depending on if you apply it yourself or get it done by a professional.
Durability and Maintenance
Teflon needs more frequent maintenance since it wears off after a few months. It’s a good choice if you want a short-term, low-cost solution.
Ceramic coatings cost more but last much longer. Once applied, you only need to wash your car regularly to keep it looking good.
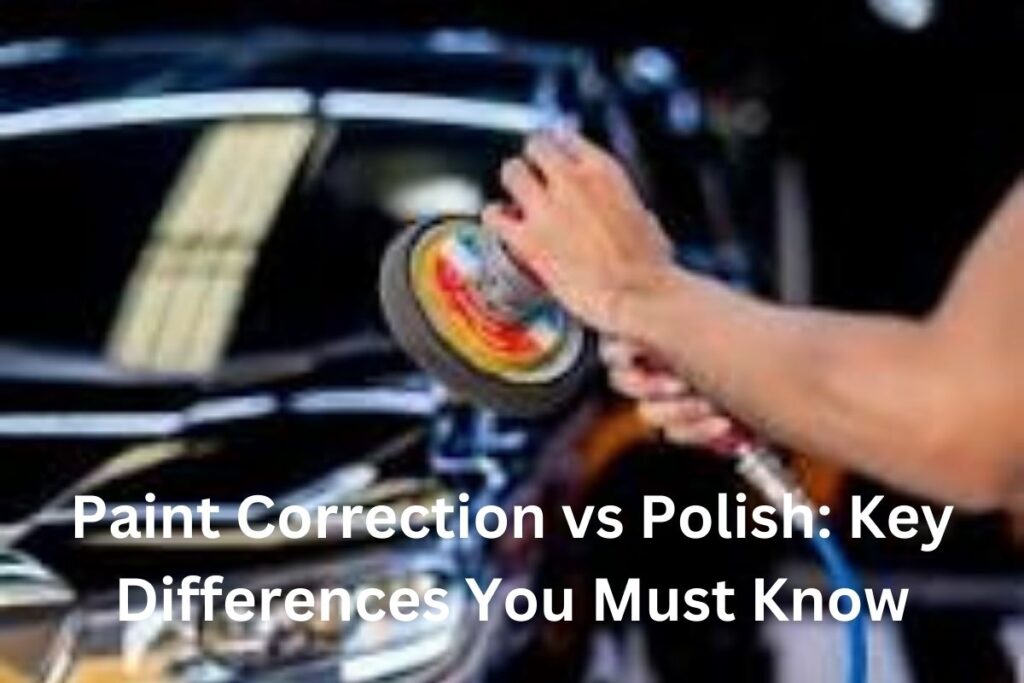
Car Wax vs Car Polish: What’s the Difference?
Many people think car wax and car polish are the same, but they’re not. They do different jobs. Knowing the difference helps, especially after paint correction, to keep your car looking great.
What Is Car Wax?
Car wax is a product you put on your car’s paint to protect it and make it shine. Wax creates a barrier that shields the paint from the sun, water, and dirt.
Wax doesn’t fix paint damage, but it helps stop future harm. After paint correction, wax locks in the shine and gives a glossy finish.
What Is Car Polish?
Car polish is used to fix small issues in the paint. It has tiny rough bits that remove scratches, swirl marks, and oxidation. Polish comes before wax because it smooths the paint, getting it ready for protection.
When to Use Wax and When to Use Polish
- Use polish if your car has scratches or marks. It will smooth the paint and remove the damage.
- Use wax after polishing to protect the paint and add shine. Wax is the last step and helps keep the car safe from future damage.
The Importance of Clay Bar Treatment Before Paint Correction
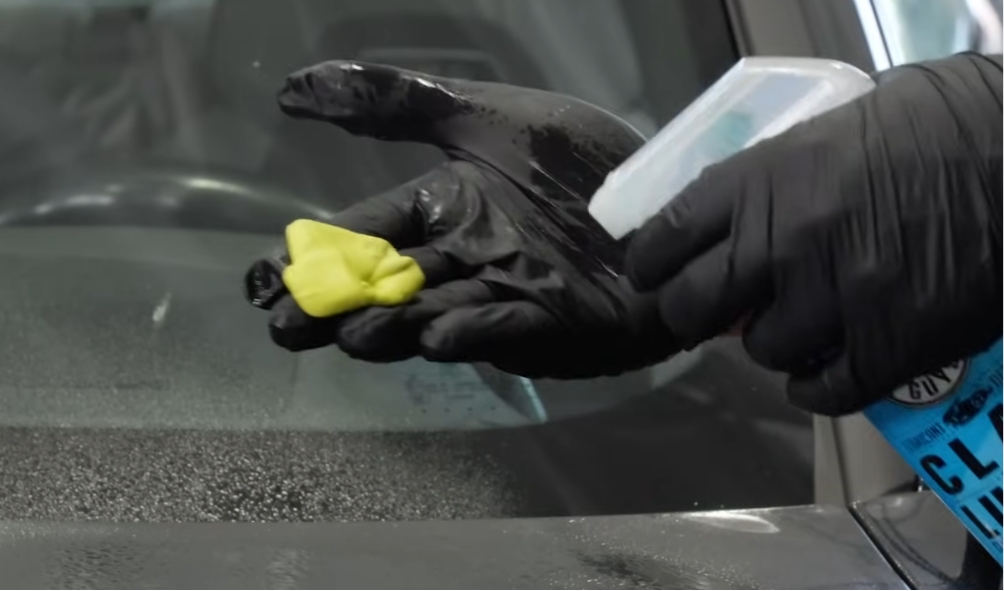
Before you start paint correction, there’s a step many people forget: clay bar treatment. A clay bar is a tool used to remove tiny particles from your car’s paint. Even if your car looks clean, small things like dirt, sap, or road tar can stick to the paint.
What Is a Clay Bar?
A clay bar is a soft, sticky product that slides over your car’s surface. It grabs small particles stuck on the paint. You must use it with a lubricant to avoid scratching. The clay bar pulls dirt and other stuff off the surface, making the paint smooth and ready for correction.
Why Clay Bar Is Important Before Paint Correction
Even after washing, some particles may still stick to the paint. If you skip the clay bar and jump into paint correction, these particles can scratch the paint. Using a clay bar makes sure the surface is clean, making paint correction smoother and easier.
How to Use a Clay Bar
Follow these steps to use a clay bar:
- Wash the car: First, wash your car well to remove loose dirt. Make sure the surface is clean before using the clay bar.
- Prepare the clay: Break off a small piece of the clay bar. Warm it in your hands to make it soft.
- Use a lubricant: Spray clay bar lubricant (or soapy water) on the car. This helps the clay slide over the paint without damaging it.
- Glide the clay bar: Gently rub the clay bar over the lubricated surface in straight lines. You’ll feel it picking up dirt. Continue until the area feels smooth.
- Check the clay: After each section, look at the clay. Fold it to a clean side. If it’s too dirty, replace it with a new piece.
- Wipe the area: Wipe the area clean with a microfiber towel. The surface should now feel smooth.
Clay bar treatment helps make paint correction better. It removes dirt and leaves the surface smooth, so your car’s paint will look flawless after polishing.
Common Paint Correction Mistakes and How to Avoid Them

Paint correction is a careful process. It can give great results, but mistakes can happen easily. These mistakes may damage your car’s paint and need professional help to fix. Here are some common mistakes and how to avoid them.
1. Over-polishing and Burning the Clear Coat
One big mistake is over-polishing. When you polish, you remove a thin layer of the clear coat to fix imperfections. If you polish too hard or for too long, you may remove too much and expose the base coat. This can’t be undone and may require repainting.
How to avoid it: Use a dual-action polisher. It’s safer for beginners and less likely to cause damage. Start with a mild polish and pad, then go stronger only if needed. Check your progress often and avoid working on one spot too much.
2. Using the Wrong Pad or Compound
Using the wrong pad or compound can damage the paint or give bad results. For example, a cutting compound with a rough pad on a lightly scratched area may remove too much clear coat.
How to avoid it: Check the damage first. For light scratches, use a soft pad with a gentle polish. For deeper damage, use a stronger pad and compound, but only if needed.
3. Skipping Decontamination
Skipping steps like clay bar treatment can leave dirt or sap on the paint. If left, your polisher can drag these across the paint, causing scratches.
How to avoid it: Always start with a clean surface. After washing, use a clay bar to remove any stuck contaminants before polishing.
4. Rushing the Process
Paint correction takes time, and rushing can lead to poor results. If you don’t spend enough time on each area or apply too much polish, you may cause uneven correction or holograms in the paint.
How to avoid it: Work slowly in small areas. Fully correct one spot before moving to the next. Use just enough polish and wipe the area clean between passes to check your work.
5. Working in Bad Lighting
If you can’t see well, you might miss imperfections or polish an area too much. Good lighting helps you spot scratches and swirls.
How to avoid it: Work in a well-lit space. Use LED lights or sunlight to see every flaw. Move the lights around and check the surface from different angles.
By avoiding these mistakes, you can ensure a smooth and successful paint correction process. Take your time, use the right tools, and check your work often for the best results.
How to Remove Tree Sap, Bird Droppings, and Other Contaminants from Paint
Nature can harm your car’s paint. Tree sap, bird droppings, and other things can cause serious damage if not removed. These materials are sticky or acidic. They can break down the clear coat and leave permanent marks. Here’s how to safely remove them and prevent damage.
How Tree Sap and Bird Droppings Harm Paint
- Tree sap: Sap hardens and becomes hard to remove. Over time, it can stain or dig into the paint.
- Bird droppings: Bird droppings are acidic. If left on the paint, they can burn through the clear coat and cause marks.
How to Safely Remove Tree Sap
- Warm water and soap: Soak the sap in warm, soapy water for a few minutes to soften it. This makes it easier to remove.
- Rubbing alcohol: For tough sap, use rubbing alcohol on a microfiber cloth. Gently rub until the sap loosens.
- Clay bar: If the sap is hard, a clay bar can lift it safely.
How to Safely Remove Bird Droppings
- Water and detailing spray: If fresh, use water and a detailing spray to wipe the droppings away.
- Soak the area: For dried droppings, soak the area with a wet cloth for a few minutes. Then, wipe it away.
- Vinegar solution: Mix white vinegar and water to break down bird droppings. Be sure to wash with soap and water after.
How to Prevent Paint Damage
- Regular washing: Wash your car often to remove dirt before it causes damage.
- Quick response: Remove bird droppings or tree sap right away to avoid long-term damage.
- Use a protective coating: Apply wax, ceramic coating, or PPF to protect the paint. This makes it easier to clean and reduces damage.
Essential Tools for Paint Correction
Having the right tools is key for good paint correction. Whether you’re fixing light swirl marks or deep scratches, the tools you use will impact the final result. Here’s a look at the must-have tools for paint correction and how to use them.
Polishing Machines
- Rotary polisher: This machine spins the pad in one direction. It’s strong and good for fixing deep scratches. But it can be hard to use for beginners because it can overheat the paint.
- Dual-action (DA) polisher: This tool is safer for beginners. It spins and moves in circles, lowering the chance of heat spots or burning the paint. It’s the best choice for DIYers because it gives great results without damaging the clear coat.
Polishing Pads
Polishing pads attach to the polisher. They come in different materials and levels of strength. Picking the right pad is important for good results without causing harm.
- Cutting pads: These pads are rough and used for deep scratches. They work with cutting compounds to remove defects quickly. Only use them when the paint needs a lot of fixing.
- Polishing pads: These pads are less rough. They are great for fixing light scratches and swirl marks. Use them to smooth the surface after a cutting pad or when the paint has small issues.
- Finishing pads: These are the softest pads. They are for the final step to make the paint shiny and smooth, usually paired with a finishing polish.
Compounds and Polishes
Compounds and polishes are the products that remove scratches and restore the paint.
- Cutting compounds: These have strong abrasives. They are used to fix deep scratches, swirl marks, and oxidation. They work with cutting pads to smooth the paint’s surface.
- Polishing compounds: These are less rough. They are used after cutting compounds to remove small defects and bring back shine to the paint.
- Finishing polishes: These are the least rough. They give the paint a glossy, smooth finish after correction.
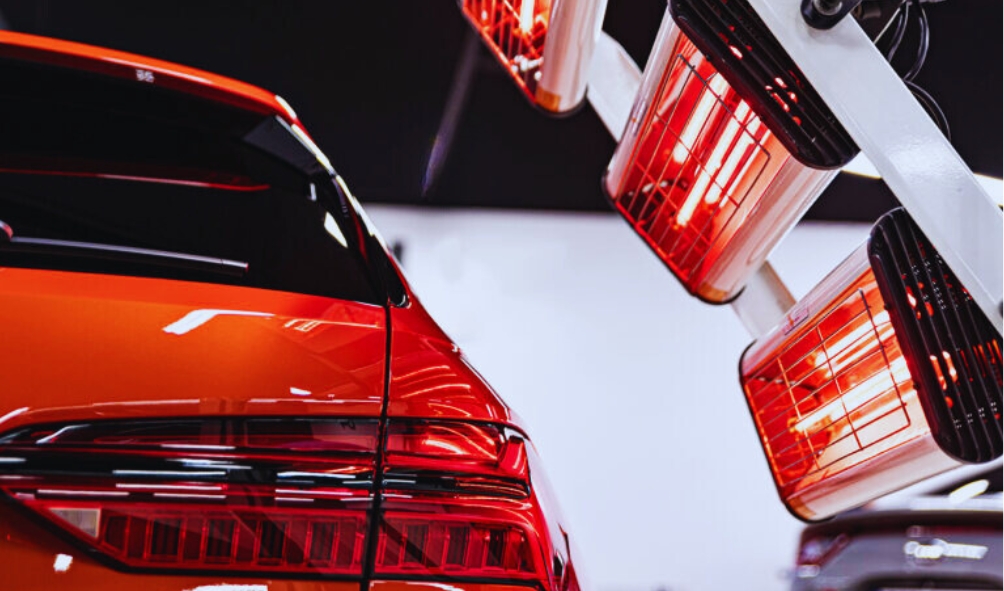
Lighting for Paint Correction
Good lighting is important to see imperfections while doing paint correction.
- LED lights: LED lights give bright, even light to show scratches and swirl marks. Portable LED work lights are great for moving around to check different areas of your car.
- Halogen lamps: These lights are warmer and can help you see flaws that LED lights might miss. Using both LED and halogen lights together can help you spot all defects.
- Natural sunlight: If possible, check your work in sunlight. Sunlight will show any missed spots that indoor lights might hide.
Why Good Lighting is Important for Paint Correction
When you work on paint correction, it’s important to see what you’re doing. Poor lighting can make you miss defects or cause uneven results. In this section, we’ll talk about the best lighting for paint correction and why it’s key for a smooth finish.
Why Proper Lighting is Important for Paint Correction
Paint correction deals with small flaws like swirl marks, scratches, and water spots. These are often hard to see in bad or dim lighting. Good lighting helps you spot these flaws so you can fix them.
If you can’t see the flaws, you won’t know when the paint is fully corrected. This can lead to over-polishing some spots or missing defects.
Types of Lights Used by Professional Detailers
- LED lights: Pros often use LED lights because they are bright and clear. LED lights don’t get too hot and can be moved around the car to light up different areas.
- Halogen lamps: Halogen lights are warmer and help show some flaws better. But they produce more heat than LED lights, so only use them for short checks.
- Natural sunlight: If possible, check your work in sunlight after paint correction. Sunlight will show any missed flaws that indoor lights might not reveal.
How to Set Up the Best Lighting for Paint Correction
- Use more than one light source: Don’t just rely on one light. Use a mix of overhead lights, LED work lights, and portable lights to see the paint from different angles.
- Look from different angles: Move around the car and adjust the lights to find flaws that might be hidden from one side.
- Avoid shadows: Shadows can hide defects. Make sure your lighting setup reduces shadows on the paint, especially when working indoors.
By setting up the right lighting, you’ll be able to see all the flaws and correct the paint perfectly.
How to Care for Your Car’s Paint After Correction
Once you’ve finished paint correction, your car’s paint will look shiny and perfect. But to keep it that way, regular care is important. Here’s how to maintain your car’s paint so it stays in great shape.
Safe Washing Techniques
Even after paint correction, bad washing methods can cause new scratches. Here’s how to wash your car safely:
- Two-bucket method: Use one bucket for soapy water and another for rinsing your wash mitt. This helps keep dirt off the paint and prevents scratches.
- Microfiber wash mitt: Use a microfiber mitt because it is soft and gentle on the paint.
- Dry with a microfiber towel: After washing, use a clean microfiber towel to dry the car. Don’t use regular towels or let the car air dry, as this can cause water spots.
Waxing and Sealing the Paint
After paint correction, adding wax or a sealant protects the surface from dirt, water, and UV rays. Wax makes the paint shiny and adds a layer of protection.
- How often to wax: Wax your car every 2-3 months, depending on the type of wax. If you use a ceramic coating, it can last 2-3 years with less frequent care.
Long-Term Protection with Ceramic Coating or PPF
For longer-lasting protection, use a ceramic coating or paint protection film (PPF). Both provide strong defense against damage and keep your car looking new.
- Ceramic coating: This liquid forms a bond with your car’s paint, offering protection that lasts for years.
- Paint protection film (PPF): PPF is a clear film that protects areas of the car from rock chips, scratches, and other damage.
Quick Detail Sprays for Maintenance
To keep your car looking clean between washes, use a quick detail spray. These sprays remove light dust and fingerprints while boosting shine. They’re great for touch-ups between full washes.
By following these steps, you can keep your car’s paint looking fresh and protect it from future damage.
Common Myths About Paint Correction
There are many myths about paint correction. Some think it harms the paint. Others think it’s only for show cars. Let’s clear up some of these myths.
Myth 1: Paint Correction is Bad for Your Car’s Paint
Some say polishing hurts the paint by removing the clear coat. While some of the clear coat is taken off, it’s done safely to make the paint smooth and shiny. When done right, paint correction helps protect the paint by fixing small issues that could cause more damage later.
Myth 2: Ceramic Coatings Last Forever
Ceramic coatings are strong, but they don’t last forever. Depending on how you care for it, a ceramic coating can last 2-5 years. Over time, it wears down and may need to be applied again.
Myth 3: Paint Protection Film Will Ruin Your Paint
Some believe that removing paint protection film (PPF) will damage the paint. But PPF is made to protect the paint and can be safely removed if a pro does the job.
Myth 4: Waxing and Polishing are the Same
Waxing and polishing are not the same. Polishing removes scratches and marks from the clear coat. Waxing, done after polishing, protects the paint and adds shine. Polish fixes flaws; wax protects the finish.
Myth 5: Paint Correction is Only for Show Cars
Paint correction is not just for fancy cars. Any car that’s used every day can benefit. It helps keep the car looking good and protects its value. Even small scratches or marks can make a big difference after correction.
In conclusion
paint correction is a great way to restore your car’s paint to look like new. It can fix swirl marks, scratches, water spots, and more. This process brings back the deep, shiny look of your car’s paint.
We’ve talked about the layers of your car’s paint, how to check for damage, and how to do paint correction. Whether you try it yourself or hire a pro, the results are worth it.
To keep your paint looking fresh, follow simple care steps. Wash your car often, use wax or ceramic coating, and protect it with paint protection film (PPF). These steps will help the paint last for years.
Call to Action
Thanks for reading this guide on paint correction. If you want to learn more about car care, check out our other articles.
- Sign up for our newsletter for car detailing tips.
- Download our free guide on keeping your car’s paint in great shape.
- Look at our product reviews for the best tools and products for paint correction.