
When it comes to paint correction, light is more than just a tool. It’s the key to showing a car’s true beauty. Without the right light, small defects like scratches or swirl marks can hide. These flaws make it hard to get the perfect finish that every detailer wants.
In this blog, we’ll explain why the right paint correction light is so important. Whether you’re a professional or a DIY detailer, the right light can help you find hidden defects and achieve a flawless finish. Let’s explore how choosing the right brightness, color temperature, and setup can improve your detailing work.
What is Paint Correction Light?
Paint correction light is a special type of light used in car detailing. It helps show scratches, swirl marks, and other tiny defects on a car’s paint. These are hard to see with regular light. Using this light makes it easier to fix and improve the car’s paint, leaving it smooth and shiny.
Why Paint Correction Lighting is Important?
Paint correction improves a car’s look by removing scratches, swirl marks, and other flaws. Many of these issues are hard to see in normal light. That’s why using a paint correction light is so important—it shows hidden problems.
Good lighting reveals small scratches and other surface flaws that you can’t see with regular garage lights. A paint correction light with the right brightness and color helps you spot and fix these issues, giving the car a smooth finish.
The Importance of Proper Lighting in Paint Correction
When you look at a car’s paint under regular light, it may look shiny and clean. But this does not always mean the paint is perfect. Many defects, like small scratches or swirl marks, are hard to see unless you use special lights.
A paint correction light helps you see these hidden problems. For example:
- Swirl marks are tiny, round scratches on the paint’s surface. They are often caused by washing the car the wrong way.
- Micro-scratches are very fine lines. You can barely see them with regular light.
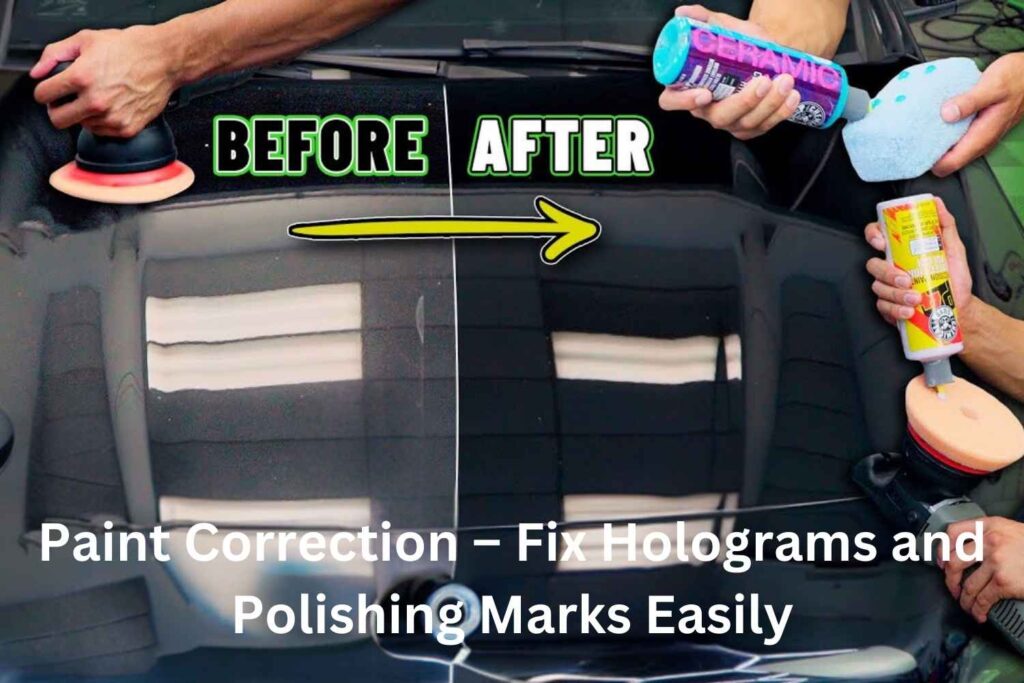
- Holograms are streaks that look like rainbows. They show up when bright, direct light shines on the paint.
How Different Lighting Affects Visibility
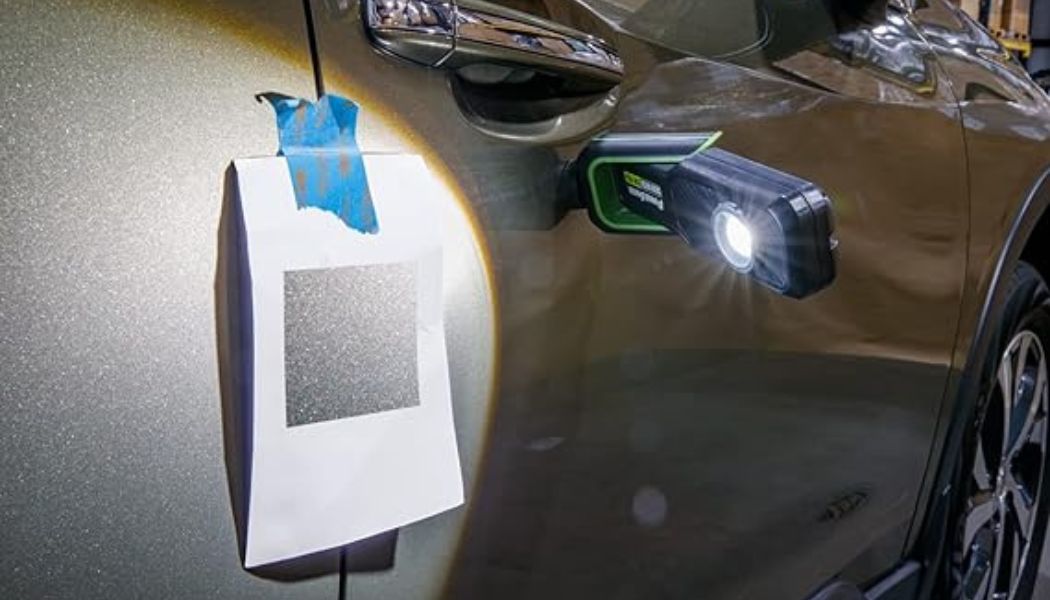
Have you ever seen swirls or scratches on your car when it’s outside in the sun that you didn’t notice in the garage? The sunlight shows flaws that indoor lighting can hide. A paint correction light works the same way, but even better.
Garage lights usually spread soft light that hides scratches. But a paint correction light, especially LEDs, shines a bright, narrow beam that reveals every tiny flaw on the car’s surface.
For example, imagine using a regular halogen light in your garage. It gives off a warm, yellow glow, making the car look good, but it won’t show small scratches or swirls. Now, switch to an LED paint correction light. Its bright, white light (like daylight) shows scratches, swirls, and tiny marks that you couldn’t see before. The focused light from LEDs helps you spot every flaw and fix it.
The Role of Color Temperature in Paint Correction
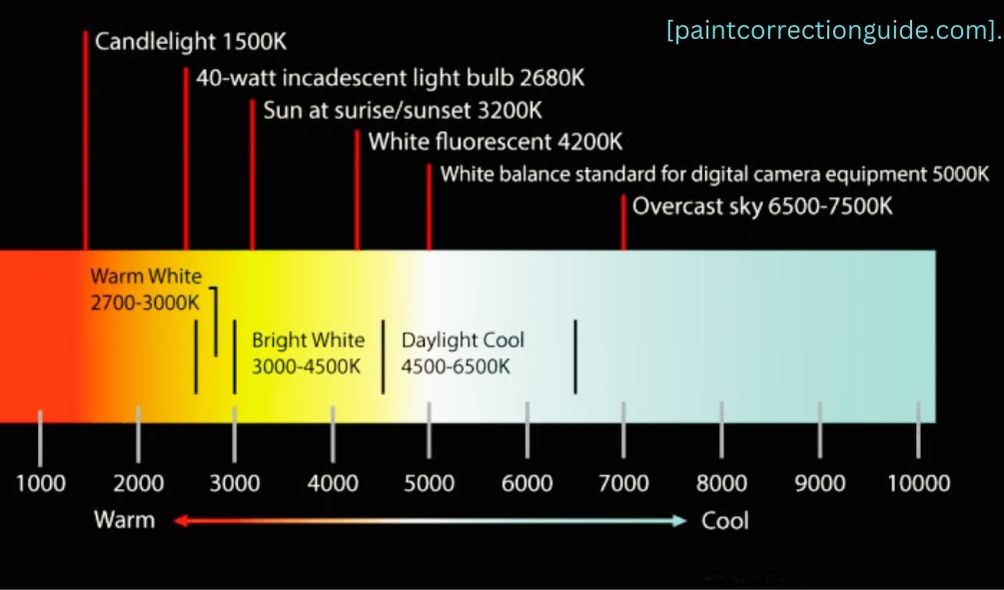
The color temperature of light is important. It measures how warm or cool the light looks. Warm lights, like normal bulbs, look yellow. Cooler lights, like daylight, look blue.
For paint correction, the best color temperature is between 5000K and 6500K. This light is similar to natural daylight. It helps you see the real condition of the paint without changing how the colors look.
Types of Paint Correction Lights
LED vs. Halogen Paint Correction Lights
There are two main types of lights used in paint correction: LED and halogen.
LED lights are more popular because they use less energy, last longer, and give off a bright, focused light. This light is great for spotting problems in the paint. LEDs also stay cool, which makes them safer to use for long periods.
Halogen lights use more energy and get very hot. They don’t last as long as LED lights. But some detailers still like them for certain jobs because they give off a warm light.
In general, LED lights are better for car detailing. They give you more control over the light and don’t overheat. This makes them good for small spaces like garages.
Portable vs. Mounted Paint Correction Lights
You can choose between portable or mounted paint correction lights.
Portable lights are handheld. You can move them around the car and check every angle. They are great for detailers who work in different places.
Mounted lights stay in one spot. You can put them on a tripod or attach them to the ceiling or walls. These lights are best for garages or shops where you do bigger projects. They provide steady light and leave your hands free.
Both types have their pros and cons. Portable lights are easy to move, while mounted lights are stable and give consistent light.
Features to Consider When Choosing a Paint Correction Light
Brightness (Lumens)
The brightness of a light is measured in lumens. For paint correction, you need enough brightness to see all the imperfections clearly.
- Small, handheld lights: A brightness level of 1000 to 1500 lumens is good for finding small defects.
- Larger, mounted lights: For bigger spaces, look for lights with 3000 to 5000 lumens or more to light up the whole area.
Color Temperature (Kelvins)
A color temperature between 5000K to 6500K is best for paint correction. This range looks like daylight and helps you see the real condition of the paint without changing how the colors look.
CRI (Color Rendering Index)
CRI, or Color Rendering Index, shows how well a light displays true colors compared to sunlight. The scale is from 0 to 100, with higher numbers meaning better color accuracy. For paint correction, a CRI of 90 or above is important.
Why does this matter? A high CRI helps you see the car’s true colors. This is key for finding small defects like swirl marks and scratches, which lower-quality lights might hide. A lower CRI can change how colors look, making it harder to spot problems and leaving the finish imperfect. By using a light with a CRI over 90, you get a clear, natural view of the car, helping you find and fix even tiny flaws.
Portability and Adjustability
If you work in different places, portability is important. Look for lights that are easy to move and adjust. A light that tilts or has a stand you can change in height will help you reach every part of the car.
Rechargeability and Power Options
Cordless, rechargeable lights are often more convenient, especially for mobile detailers. They give you more flexibility and freedom of movement. However, battery life is an important factor to consider. Look for lights that offer at least 4-6 hours of runtime on a single charge, so you don’t have to worry about frequent recharging. On the other hand, wired lights provide continuous power, but they may limit your movement due to the cord. Choose the option that best fits your workspace and needs.
Top Paint Correction Lights in the Market (Product Reviews)
SCANGRIP MultiMatch R
SCANGRIP MultiMatch R – A professional-grade light with multiple features like Bluetooth control and dimming options. It is priced around $250-$300, making it ideal for serious detailers who want top-quality lighting.
Rupes LL150 LED Light
Rupes LL150 LED Light – This portable LED light is compact, easy to carry, and provides bright, focused light. It is priced between $100-$150, making it a great option for mobile detailers or those working in tight spaces.
Hykolity LED Shop Lights
Hykolity LED Shop Lights – Perfect for permanent garage setups, these overhead lights provide powerful illumination for larger projects. They are typically priced around $50-$100, offering good value for detailers setting up a workspace.
Piramida LED Dual-Head Work Light
Piramida LED Dual-Head Work Light – A more affordable option for beginners or small shops, this dual-head light provides adjustable illumination. It’s priced at around $50-$70, making it a budget-friendly choice for those just starting out.
How to Set Up the Perfect Paint Correction Light for Your Workspace
To get the best results, you need to set up your lighting the right way. Here’s how:
Overhead lights work well for general lighting. But, you also need direct light to spot defects up close. Use mounted or portable lights and place them at different angles.
To avoid shadows, position the lights so they don’t cast shadows on the surface you are working on. If you see dark spots on the car, move the light or change its angle.
Portable Lighting Tips for Mobile Detailers
If you are a mobile detailer, use handheld lights with adjustable brightness. These lights are easy to carry and let you check the car from different angles. This way, you won’t miss any defects.
Common Mistakes to Avoid When Using Paint Correction Lights
Using the Wrong Color Temperature
Using lights that are too warm or too cool can change how the paint looks. Stay in the 5000K to 6500K range to see colors clearly and spot any defects.
Over-Illuminating the Workspace
Too much brightness can cause eye strain and make it harder to see small defects. Use adjustable lights and dim them when needed to avoid too much light.
Ignoring CRI (Color Rendering Index)
A low CRI can change how colors look, making it hard to see defects. Choose lights with a CRI of 90 or higher for the best color accuracy. This will help you see the true condition of the car’s paint.
Achieving Professional-Quality Paint Correction with the Right Light
Using the right light is key for anyone who wants great results in car detailing. Whether you are a DIY detailer, a professional, or work in a shop, the right light will help you see and fix defects. This ensures a smooth, perfect finish every time.
Choose a light with the right brightness, color temperature, and CRI. Set up your workspace properly, and you will get professional-looking results.
Call-to-Action
Now that you know how important the right light is for perfect results, it’s time to act! Whether you’re a pro or like to do it yourself, the right light will make your work better. Look at the options, choose the best light for you, and start fixing those flaws like a pro.
We’d love to hear from you! Have you used any of the lights from this guide? Share your thoughts, favorite tools, or even pictures of your results in the comments below. Let’s keep talking and help each other get that perfect finish!
Frequently Asked Questions (FAQs)
What is Paint Correction Light, and how is it different from full paint correction?
Paint Correction Light is a simple way to fix small paint problems. It removes light swirl marks, tiny scratches, and oxidation. It makes your car shine, but it doesn’t fix deep scratches like full paint correction does.
How long does Paint Correction Light last?
How long it lasts depends on how you care for your car. If you wash it regularly and add a protective layer, it can last for a few months.
Is Paint Correction Light safe for all types of paint?
Yes, it’s safe for most types of paint, like clear coats and metallic finishes. But it’s a good idea to check your paint and talk to a professional first.
Does Paint Correction Light remove all scratches?
It works well on small scratches and marks. But for deep scratches, you might need full paint correction.
Can I do Paint Correction Light myself, or should I hire a professional?
You can do it at home if you have the right tools. But it’s best to hire a pro for better results, especially if you’re not sure how to do it. Mistakes can cause more damage to your paint.