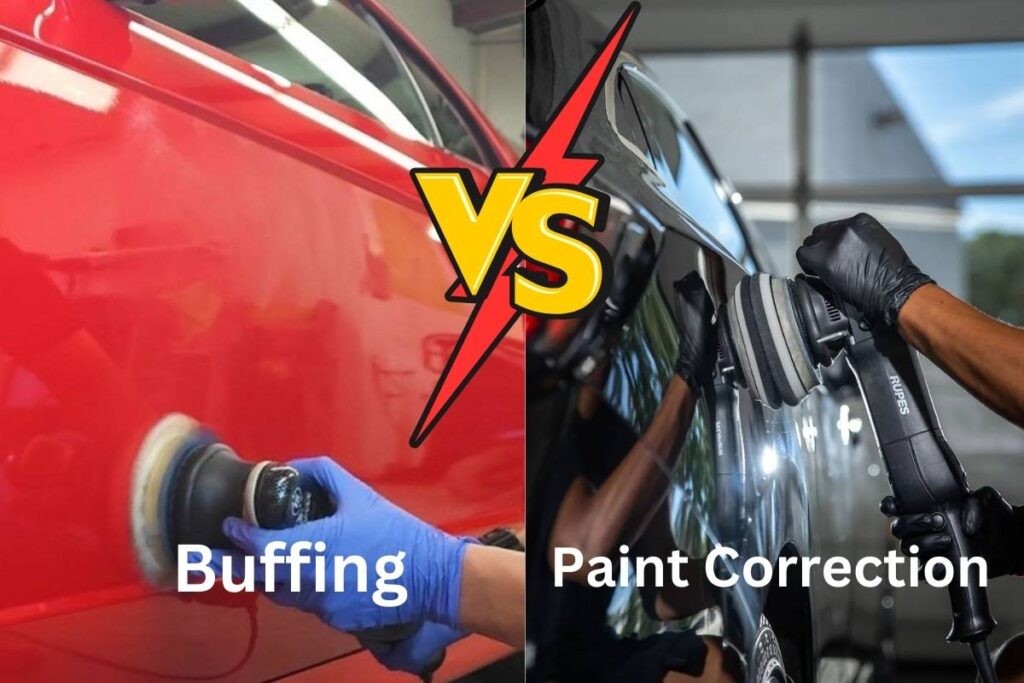
Ever notice streaks or swirls on your car’s paint that stand out in bright light? These are holograms and polishing marks, common issues that ruin the smooth, shiny finish of your vehicle. They happen when polishing is done the wrong way, leaving scratches instead of perfection.
You might wonder how to fix these marks and bring back that flawless, mirror-like shine. The good news? It’s possible to correct these imperfections with the right tools and techniques.
This blog will show you what causes these marks, how to remove them step by step, and how to prevent them in the future. By the end, you’ll know how to make your car’s paint look new again—like it just rolled out of the showroom.
Table of Contents
ToggleWhat Are Holograms and Polishing Marks?
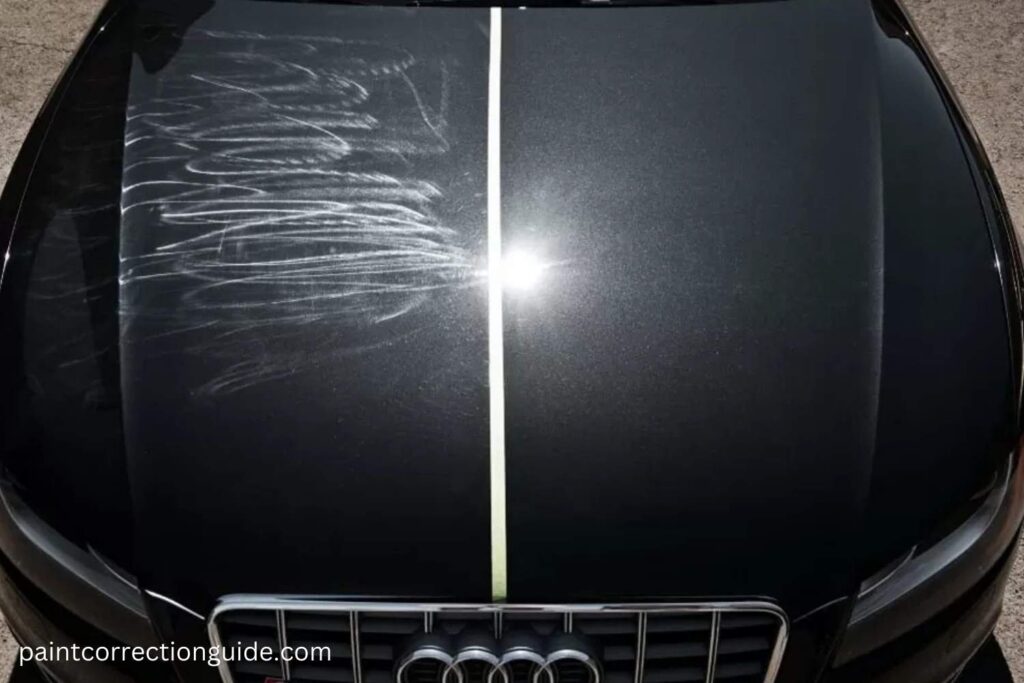
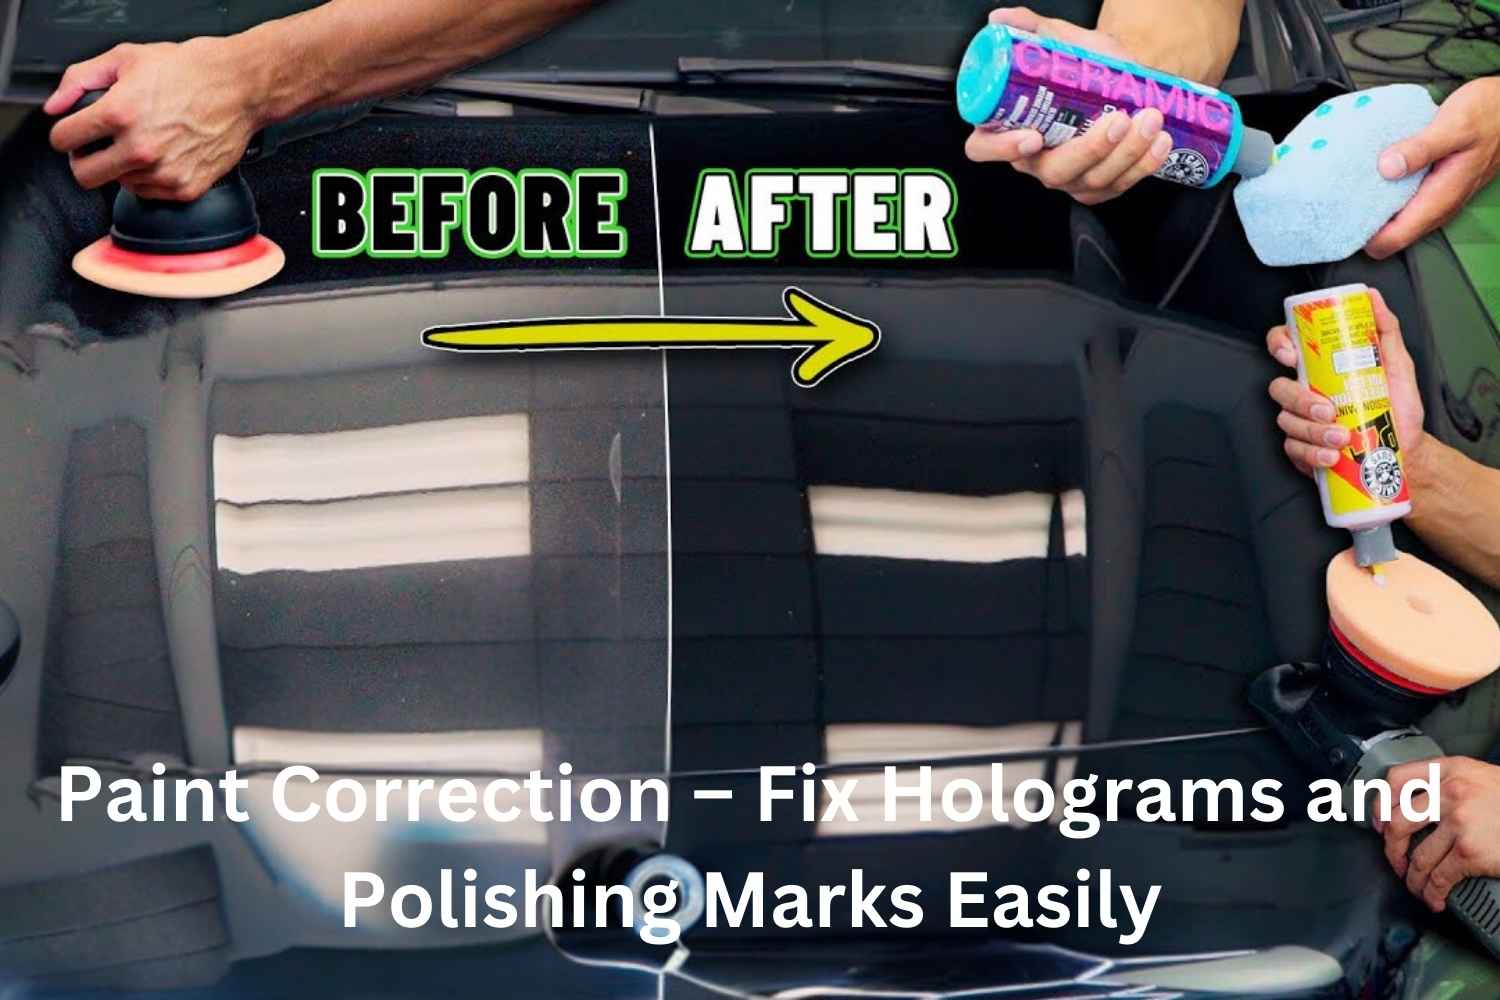
Holograms and polishing marks are two of the most common paint imperfections you’ll find on a car’s surface, often showing up after an attempt to improve the finish through polishing or buffing. While they might look similar at first glance, they are distinct defects caused by different factors.
What Are Holograms?
Holograms, also known as buffer trails, are swirling patterns or streaks that appear on a car’s paint under direct light. They are caused by the improper use of a rotary buffer, where uneven pressure or a poorly chosen polishing pad creates fine scratches. These scratches reflect light unevenly, giving the appearance of a hologram. The result is a paint surface that looks dull or cloudy rather than smooth and shiny.
What Are Polishing Marks?
Polishing marks are slightly different. They appear as fine lines or micro-marring left on the surface during the polishing process. These marks can occur when a polishing compound is too abrasive, the pad isn’t suitable for the task, or the technique isn’t executed correctly. Unlike holograms, polishing marks are usually more random in appearance but equally frustrating for car owners.
How Do They Affect Your Car?
Both holograms and polishing marks can diminish the overall appearance of your car. Even a freshly cleaned vehicle won’t look its best if these imperfections are visible. They can also reduce the clarity and depth of the paint, making it look older or poorly maintained. Beyond aesthetics, they signal that the paint’s clear coat—the protective outer layer—has been scratched, which could lead to further damage if not addressed.
By understanding the difference between holograms and polishing marks, you’ll be better prepared to identify the issue on your vehicle and take the right steps to fix it. In the next section, we’ll explore why these imperfections occur in the first place.
Why Do Holograms and Polishing Marks Occur?
Holograms and polishing marks are not random defects; they happen due to specific mistakes or improper techniques during the car detailing process. Understanding these causes will help you avoid repeating them and maintain a flawless finish on your car’s paint.
Improper Polishing Techniques
One of the most common reasons for holograms and polishing marks is using the wrong technique while polishing. For example, when a rotary buffer is used without enough care, the pad can create tiny scratches on the car’s clear coat. These scratches are what cause the swirling patterns we call holograms. Additionally, moving the polisher too quickly or applying uneven pressure across the surface can leave behind polishing marks.
Using the Wrong Polishing Tools or Pads
Different polishing jobs require specific tools and pads. Using a hard or abrasive pad on a delicate clear coat can easily create micro-marring, which leads to holograms. Similarly, low-quality pads or those not suited for the job can leave behind streaks and uneven patches.
Overuse or Misuse of Polishing Compounds
Polishing compounds are designed to remove imperfections, but when used incorrectly, they can cause more harm than good. For example, applying too much compound or not breaking it down properly can leave residue on the paint, which results in polishing marks. If a compound is too aggressive for the car’s paint type, it can also cause excessive micro-marring.
Lack of Preparation Before Polishing
Preparation is key to achieving a smooth and consistent finish. If the car’s surface isn’t cleaned thoroughly before polishing, any dirt or debris left behind can get caught in the pad and scratch the paint during the process. Even a small speck of dust can create visible marks when it’s dragged across the surface by a polisher.
Environmental Factors
Sometimes, the environment where the polishing is done can contribute to these defects. For instance, polishing in direct sunlight or in high temperatures can cause the compound to dry out too quickly, making it harder to achieve a smooth finish. Similarly, polishing in a dusty area increases the risk of particles getting trapped under the pad.
Inadequate Knowledge or Training
Polishing a car isn’t as simple as it looks. Without proper training or understanding of the process, it’s easy to make mistakes that lead to holograms and polishing marks. Rushing through the job, skipping steps, or not understanding how to handle the tools are all common issues that cause these problems.
By recognizing these causes, you’ll have a better idea of what to avoid when polishing your car. The good news is that most of these issues can be prevented with proper preparation, the right tools, and a little patience.
Why Is Paint Correction Important?
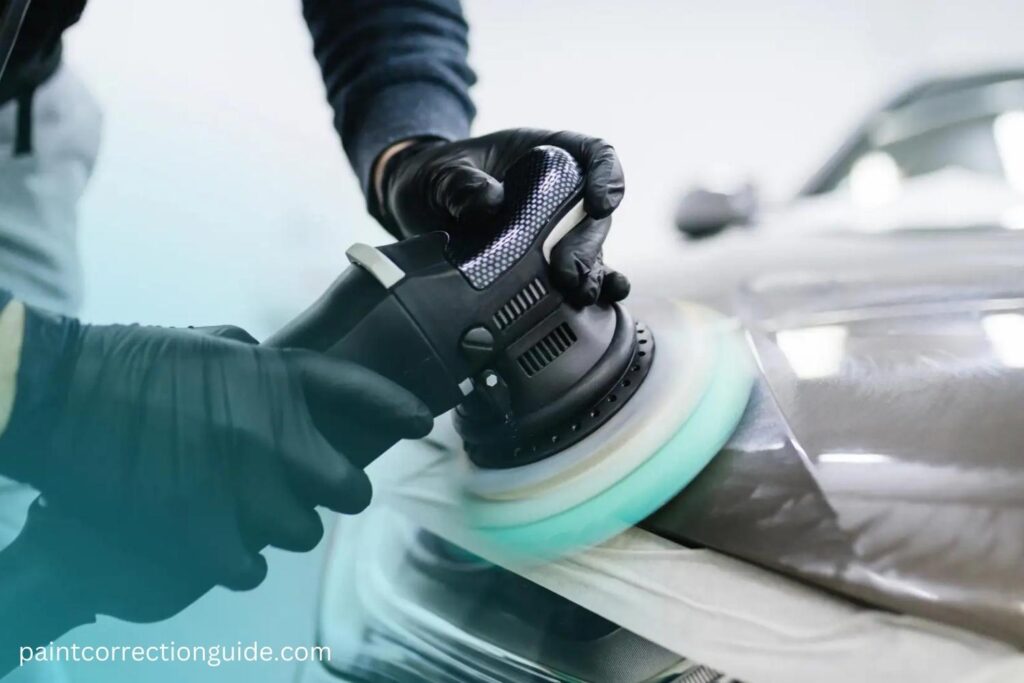
Paint correction is not just about making a car look shiny; it’s an essential process that restores the beauty and value of a vehicle’s paintwork. Whether you’re a car enthusiast or someone who wants to protect their investment, understanding the importance of paint correction can help you appreciate why it’s worth the effort.
Protects the Clear Coat and Paint Surface
The clear coat on your car is the top layer of its paint, and it plays a vital role in protecting the paint underneath from environmental damage. Holograms and polishing marks may seem like minor issues, but they weaken the integrity of this protective layer over time. Proper paint correction removes these imperfections, ensuring that the clear coat can continue to safeguard the paint beneath from UV rays, dirt, and moisture.
Restores the Aesthetic Appeal
There’s nothing quite like the look of a car with a flawless, mirror-like finish. Holograms and polishing marks disrupt the smooth reflection of light, making even a clean car look dull and aged. Paint correction brings back the original beauty of the vehicle’s surface, giving it a polished and professional appearance. This is especially important for car enthusiasts who take pride in their vehicle’s appearance or those preparing their car for a show or event.
Maintains Resale Value
If you’re planning to sell your car, first impressions matter. A car with visible paint defects like holograms and polishing marks can give the impression that it hasn’t been well-maintained. Paint correction not only enhances the car’s visual appeal but also signals to potential buyers that the vehicle has been cared for properly. This can significantly boost its resale value.
Prevents Long-Term Damage
While holograms and polishing marks might seem like surface-level issues, they can lead to more serious damage if left untreated. Dirt and moisture can accumulate in these micro-imperfections, causing further wear and tear on the clear coat. By addressing these defects early through paint correction, you can prevent more extensive damage that might require costly repairs in the future.
Improves Overall Driving Experience
Driving a car that looks great isn’t just about impressing others—it’s about how you feel behind the wheel. A perfectly corrected paint surface reflects your attention to detail and care for your vehicle. It’s a rewarding feeling to see your car looking its best every time you approach it or catch its reflection.
Paint correction is more than just an aesthetic upgrade; it’s an investment in your vehicle’s long-term health and value. Whether you’re doing it yourself or hiring a professional, the results are always worth it.
How to Fix Holograms and Polishing Marks
Fixing holograms and polishing marks is a meticulous process that demands careful attention, the right tools, and proper techniques. This procedure, widely known as paint correction, aims to remove imperfections on the surface and restore the clear coat of your car to a smooth, reflective finish. By following a step-by-step approach, you can achieve professional-level results and bring out the best in your vehicle’s appearance.
Step 1: Assess the Damage
Before diving into the correction process, the first crucial step is assessing the extent of the damage. Inspecting the car’s paintwork under proper lighting is key to identifying holograms and polishing marks. Bright, direct light—such as a flashlight or sunlight—makes these imperfections more visible, highlighting areas that require attention. During this step, take note of the specific spots that exhibit defects. Identifying problem areas early helps focus your efforts where they are needed most, ensuring you don’t waste time or unintentionally overwork unaffected sections of the paint.
Step 2: Gather the Right Tools and Products
Before starting, gather the necessary tools and materials. Here’s what you’ll need:
Proper Lighting: Use bright, direct lighting to reveal defects clearly and monitor your progress.
Dual-Action (DA) Polisher: A DA polisher is safer and more user-friendly than a rotary buffer, making it ideal for reducing holograms and marks.
Polishing Pads: Use foam pads designed for your specific task—medium-cut pads for defect removal and soft finishing pads for polishing.
Polishing Compounds: Select a high-quality compound suitable for your car’s paint type. A mild abrasive is recommended to minimize the risk of new scratches.
Microfiber Cloths: Soft, lint-free microfiber cloths are crucial for wiping away excess compound without causing damage.
Paint Thickness Gauge (Optional): This tool helps you measure the thickness of the clear coat, ensuring you don’t polish too aggressively.
Step 3: Clean and Prepare the Surface
Before any polishing begins, the car’s surface must be thoroughly cleaned and prepped. Washing the car carefully removes dirt, dust, and other debris that could scratch the paint during polishing. Even the smallest particles can act like sandpaper when caught between the polishing pad and the surface, so this step cannot be skipped. After washing, dry the car completely and use a paint cleaner or isopropyl alcohol to eliminate any remaining contaminants, wax, or grease. This preparation ensures that the polishing compound works efficiently, directly addressing the imperfections rather than being hindered by surface residues.
Step 4: Start Polishing with Controlled Movements
Once the car is clean and prepped, it’s time to begin polishing. Start by attaching the chosen polishing pad to your dual-action polisher and applying a small amount of polishing compound directly onto the pad. It’s important to work in small sections—around two feet by two feet—to maintain control and achieve consistent results. Move the polisher in slow, overlapping motions to ensure even coverage across the section. Keep the pad flat against the surface and avoid applying excessive pressure; let the polisher and the compound do the work for you. After completing a section, inspect the results under good lighting to evaluate progress.
Step 5: Wipe and Inspect the Surface
After polishing a section, it’s important to immediately wipe away any residue using a clean microfiber towel. This allows you to clearly see the progress made and determine if additional polishing is necessary. If some imperfections persist, consider repeating the process with a finer compound or a softer pad. The key here is patience—rushing through this step can lead to uneven results or missed areas. Taking the time to inspect and refine each section ensures a smooth, flawless finish.
Step 6: Finish with a Protective Coating
The final step in the process is applying a protective layer. This step not only enhances the polished finish but also safeguards the paintwork from future imperfections. Products like wax, sealants, or ceramic coatings create a protective barrier against dirt, UV rays, and moisture, helping to maintain the results of your hard work. A ceramic coating, in particular, offers long-lasting protection and a high-gloss finish, making it an excellent choice for car enthusiasts.
Pro Tips for Success
- Use proper lighting: Good lighting helps you spot defects and ensures thorough correction.
- Work in a cool environment: Polishing in direct sunlight or high heat can cause compounds to dry too quickly.
- Keep pads clean: Clean your polishing pads regularly to prevent product buildup and achieve consistent results.
By following these steps, you can successfully remove holograms and polishing marks, leaving your car’s paint with a flawless, mirror-like finish. Whether you’re tackling the task yourself or working with a professional, proper technique is the key to a job well done.
Common Mistakes in Paint Correction and How to Avoid Them
Even with the best tools and intentions, paint correction can go wrong if certain mistakes are made. These errors not only fail to fix the problem but can also create new issues that are harder to repair. By understanding these common mistakes and how to avoid them, you can achieve a flawless finish every time.
Mistake 1: Using the Wrong Tools or Pads
One of the biggest mistakes in paint correction is using the wrong type of polisher or pad for the job. For example, a rotary buffer can be too aggressive for beginners, increasing the risk of creating new holograms or even burning the paint. Similarly, using a pad that’s too abrasive can cause unnecessary scratches and leave the surface worse than before.
How to Avoid It:
Choose a dual-action polisher for more control and lower risk of damage. Use pads that match the level of correction needed—start with a softer pad and less aggressive compound, then adjust as necessary.
Mistake 2: Applying Too Much Pressure
Many people think that pressing harder with the polisher will speed up the process or deliver better results. In reality, excessive pressure can damage the clear coat, create uneven polishing marks, or overheat the paint surface.
How to Avoid It:
Let the machine and the polishing compound do the work. Use light to moderate pressure and keep your movements slow and consistent. If you’re not sure, it’s better to err on the side of caution.
Mistake 3: Polishing a Dirty Surface
Skipping the cleaning step or working on a car that hasn’t been properly washed is a recipe for disaster. Dirt and debris on the surface can get trapped in the polishing pad, causing scratches and swirls during the correction process.
How to Avoid It:
Always wash and dry the car thoroughly before starting. Use a clay bar or paint cleaner to remove any embedded contaminants for a perfectly clean surface.
Mistake 4: Rushing Through the Process
Paint correction is not a task that can be rushed. Working too quickly or skipping steps can lead to uneven results, leftover polishing marks, or missed areas. This often happens when people try to cover large sections at once.
How to Avoid It:
Work in small, manageable sections—about 2×2 feet at a time. Take your time to ensure each section is polished evenly before moving on.
Mistake 5: Neglecting to Check Progress
Many beginners don’t stop to inspect their work as they go, only to find later that the imperfections are still visible or that new marks have been created. This can mean having to redo the entire process.
How to Avoid It:
After polishing each section, wipe away the residue with a microfiber cloth and check the surface under good lighting. This allows you to catch any issues early and adjust your approach if needed.
Mistake 6: Ignoring Pad and Compound Maintenance
Dirty pads or dried-out compounds can make the polishing process less effective and even damage the paint. Some people use the same pad for the entire job without realizing that buildup reduces its efficiency.
How to Avoid It:
Clean your pads regularly during the process to remove any product buildup. Use a fresh pad when switching to a different compound, and store your compounds in a cool, dry place to keep them in good condition.
Mistake 7: Skipping the Protective Coating
After spending time correcting the paint, some people skip the final step of applying a protective coating. This leaves the paint vulnerable to future imperfections, undoing all the hard work.
How to Avoid It:
Always finish with a layer of protection, such as wax, sealant, or ceramic coating. This not only enhances the shine but also protects the paint from dirt, UV rays, and moisture.
By avoiding these common mistakes, you’ll save yourself time, effort, and frustration while achieving professional-quality results. Proper preparation, patience, and attention to detail are the keys to successful paint correction.
Preventing Holograms and Polishing Marks
The best way to deal with holograms and polishing marks is to prevent them from occurring in the first place. Proper techniques, tools, and maintenance practices can help you keep your car’s paint in pristine condition. Here are the steps you can take to avoid these imperfections.
Use Proper Washing and Drying Techniques
A clean surface is the foundation of any detailing process. Use the two-bucket method when washing your car—one bucket for soapy water and another for rinsing your wash mitt. This minimizes the chance of dirt particles scratching the surface. Always use microfiber drying towels instead of regular cloths to avoid leaving marks after washing.
Choose the Right Polishing Tools and Products
Selecting appropriate tools and products is critical for preventing holograms and polishing marks. Opt for a dual-action polisher, which is easier to control and less likely to cause damage compared to a rotary buffer. Use polishing compounds and pads that are compatible with your car’s clear coat. Always test a new product on a small, inconspicuous area before applying it to the entire car.
Regular Maintenance of Polishing Tools
Dirty or worn-out tools can create more harm than good. After every use, clean your pads, polishers, and microfiber cloths to remove any contaminants. Replace polishing pads that show signs of wear, as they can lead to uneven results or scratches. Proper maintenance ensures your tools work effectively and safely.
Work in Optimal Conditions
The environment plays a significant role in the success of paint correction. Always work in a cool, shaded area to prevent the surface from overheating. Avoid dusty or windy environments that can introduce particles during the process. If possible, set up proper lighting to clearly see the paint’s condition and monitor your progress.
Avoid Aggressive Polishing Techniques
Aggressive polishing—using too much pressure, working at high speeds, or spending too much time on one area—can thin the clear coat and cause holograms. Be gentle and consistent, allowing the tools and products to do their job. Follow the recommended speed settings for your polisher, and don’t rush the process.
Invest in Quality Protective Coatings
Applying a protective layer after paint correction can reduce the risk of future holograms and polishing marks. Ceramic coatings, paint protection films (PPF), or high-quality waxes act as barriers against dirt, UV rays, and minor abrasions. These coatings also make the surface easier to clean, reducing the chances of accidental damage during washing.
Educate Yourself on Best Practices
If you’re new to detailing, take the time to learn proper techniques. Watch tutorials, read guides, and practice on less visible parts of the car before tackling prominent areas. Understanding the basics of polishing and paint correction can help you avoid costly mistakes.
Schedule Regular Maintenance
Even with the best practices, cars are exposed to elements that can degrade the paint over time. Schedule regular maintenance, including washing, decontamination, and light polishing, to keep your car looking its best. Address minor imperfections early before they develop into bigger problems.
By incorporating these preventive measures into your car care routine, you can protect your vehicle’s paintwork and maintain its flawless appearance. Prevention is always easier and more cost-effective than correction. In the next section, we’ll tackle frequently asked questions about paint correction to address common concerns.
Conclusion
Paint correction is more than just a cosmetic upgrade—it’s a vital process for maintaining the beauty and longevity of your car’s paintwork. Holograms and polishing marks may seem like minor imperfections, but they can significantly affect the appearance of your vehicle, making it look older and less cared for. By understanding what these defects are, why they occur, and how to address them, you can restore your car’s finish and protect it for years to come.
This guide has covered everything you need to know about paint correction, from identifying the causes of holograms and polishing marks to learning how to fix and prevent them. Whether you’re a car enthusiast, a DIY detailer, or someone considering professional help, these insights empower you to make informed decisions about your vehicle’s care.
Remember, the key to successful paint correction lies in preparation, patience, and using the right tools and techniques. If you’re tackling the job yourself, start with small, manageable sections and check your progress as you go. If you prefer professional results, investing in a reputable detailer can save time and ensure perfection.
Lastly, prevention is always better than correction. Adopting proper washing, drying, and maintenance habits will keep your car looking flawless and reduce the need for frequent corrections. Applying protective coatings like wax or ceramic sealants is an excellent way to preserve your hard work and shield the paint from future damage.
In the end, achieving a mirror-like finish on your car isn’t just about aesthetics—it’s about taking pride in your vehicle and ensuring it remains a reflection of your care and attention to detail. With the knowledge and tips provided in this guide, you’re now equipped to enjoy a flawless, showroom-quality shine every time you hit the road.
Frequently Asked Questions (FAQs)
What causes holograms and polishing marks on car paint?
Holograms and polishing marks often result from improper polishing techniques. Using the wrong type of polisher, applying too much pressure, or selecting unsuitable pads and compounds can create these imperfections.
Can I remove holograms and polishing marks by hand?
Yes, it’s possible to remove minor holograms and polishing marks by hand. This requires appropriate polishing compounds, clean applicator pads, and patience. However, for severe imperfections, using a dual-action polisher may yield better results.
How can I prevent holograms from appearing after polishing?
To prevent holograms, use a dual-action polisher instead of a rotary buffer. Ensure you select the correct pads and compounds for your car’s paint type. Applying even pressure and working in small sections also helps avoid these marks.
Is it necessary to apply a protective coating after removing polishing marks?
Applying a protective coating, such as wax or sealant, after removing polishing marks is highly recommended. This protects the paint from environmental damage and helps maintain a glossy finish.
Should I seek professional help for removing severe holograms?
If the holograms are extensive or if you’re unsure about the polishing process, it’s advisable to consult a professional detailer. They have the expertise and equipment to restore your car’s paint safely and effectively.

