
Keeping your car’s paint looking fresh is one of the best ways to preserve its value and appearance over time. You may have noticed that, no matter how often you wash and wax your car, it still doesn’t have that glassy, smooth finish you see on showroom floors. That’s because regular washing can’t remove the deep-seated contaminants that cling to your car’s paint. These are particles like brake dust, tree sap, and industrial fallout that can make your paint feel rough and look dull. That’s where a clay bar comes into play. A clay bar is an essential tool in car detailing that lifts these contaminants off your car’s surface, leaving it smooth and ready for further treatment. In this guide, I’ll walk you through what a clay bar is, how to use it, and why it’s such a game-changer for anyone serious about maintaining their car’s paint.
What is a Clay Bar and How Does It Work?
When I first heard about clay bars, I was skeptical. The idea of rubbing clay on my car seemed counterintuitive, but after trying it, I quickly became a believer. A clay bar is essentially a flexible, synthetic resin that’s slightly sticky to the touch. It’s designed to pull out all the impurities that regular washing leaves behind. Think of it as a magnet for all those tiny particles that bond to your car’s paint over time—particles that can cause damage if left unchecked.
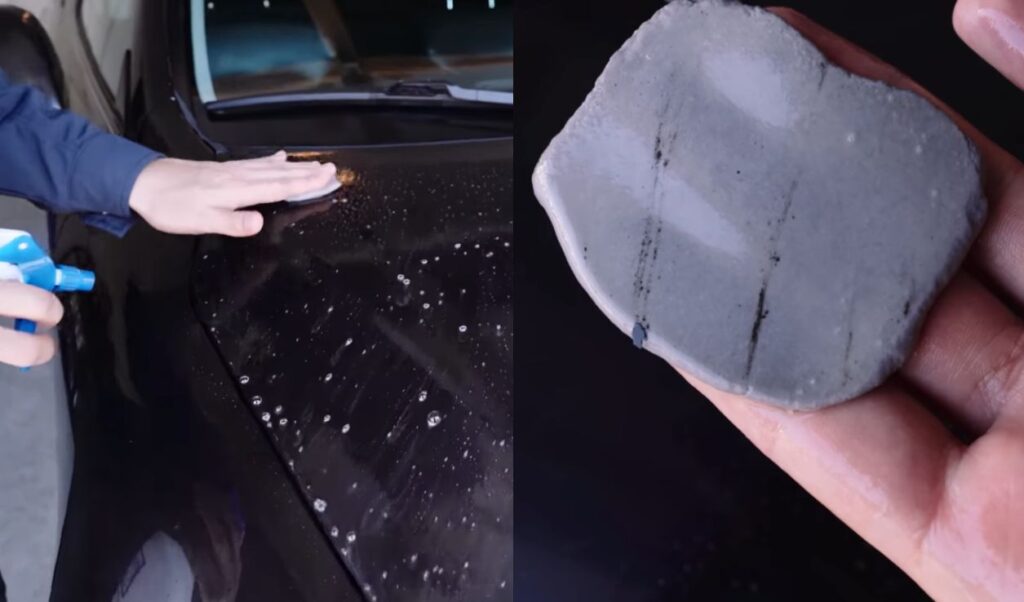
Here’s how it works: You start by thoroughly washing and drying your car. Then, using a detail spray or a special clay bar lubricant, you glide the clay bar over your car’s surface. As the clay moves across the paint, it picks up these contaminants and traps them in the clay, ensuring they don’t scratch the paint as you work.
One thing that really surprised me was how smooth the paint felt afterward. Before using the clay bar, my car’s paint had a slightly gritty texture, but after just one pass, it felt as smooth as glass. The difference is especially noticeable when you run your hand over the paint before and after using the clay bar. It’s like night and day.
Different clay bars come in varying levels of abrasiveness—fine, medium, and heavy. If your car is relatively new or well-maintained, a fine clay bar will likely do the trick. For older cars or those that have never been clayed before, a medium or heavy grade might be necessary to get all those stubborn contaminants out. But don’t worry, no matter which one you choose, you’ll be amazed at the difference it makes.
Benefits of Using a Clay Bar on Your Car Paint
I’ll be honest, before I started using a clay bar, I didn’t think it was necessary. But after seeing the results, I can’t imagine skipping this step in my car care routine. Here are some of the top benefits I’ve experienced since I started claying my car’s paint.
First off, using a clay bar gives your car’s paint a smooth, glassy finish that you just can’t achieve with washing alone. This is because the clay bar removes all the microscopic contaminants that bond to your paint over time. Things like brake dust, industrial fallout, and tree sap can’t be removed by washing alone, and they can make your paint feel rough and look dull. After claying, your car’s paint will feel silky smooth, and it’ll have a noticeable shine that wasn’t there before.
Another huge benefit is that it prepares your car for waxing or polishing. Car Wax and polish adhere better to a clean surface, and a clay bar ensures that your car’s paint is as clean as possible. When I first used a clay bar before waxing, I noticed that the wax went on more smoothly and evenly, and the shine lasted longer.
Lastly, using a clay bar can extend the life of your car’s paint. Contaminants that are left on your paint can cause oxidation and corrosion over time, which can lead to more serious issues like rust. By regularly using a clay bar, you’re removing these harmful particles before they can cause damage, which helps keep your car’s paint in great condition for years to come.
How to Use a Clay Bar: Step-by-Step Guide
Using a clay bar might sound a bit intimidating at first, but once you get the hang of it, it’s actually pretty straightforward. Here’s a step-by-step guide based on my own experience to help you get started.
Step 1: Wash and Dry Your Car
Before you even think about using a clay bar, you need to wash your car thoroughly. This removes the loose dirt and grime that could scratch your paint if trapped under the clay. After washing, dry your car completely with a microfiber towel.
Step 2: Prepare the Clay Bar
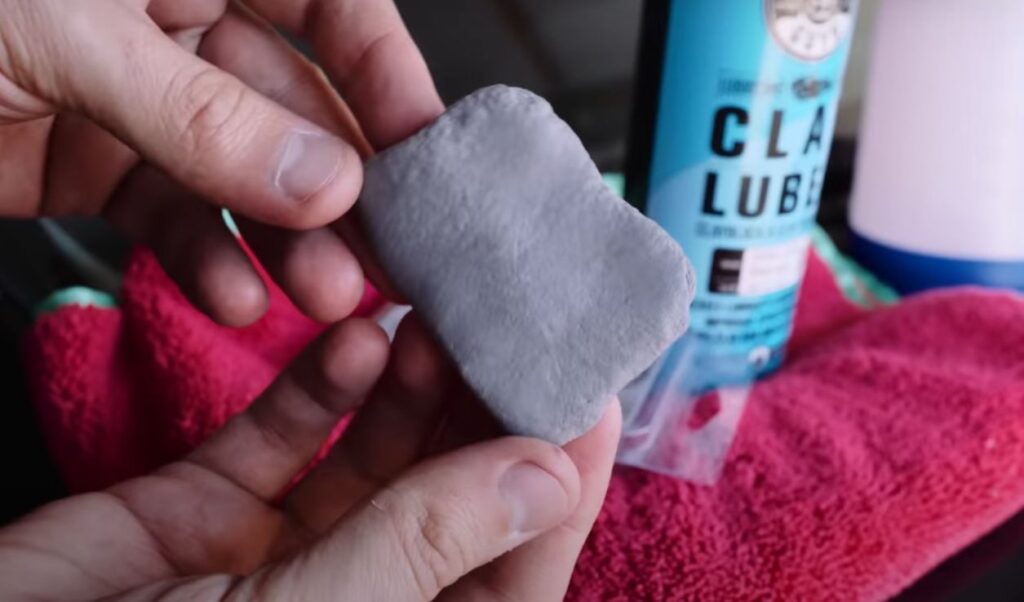
Take your clay bar out of the packaging and knead it in your hands until it’s soft and pliable. You want to flatten it into a small, pancake-like shape that’s easy to hold and maneuver.
Step 3: Apply Lubricant
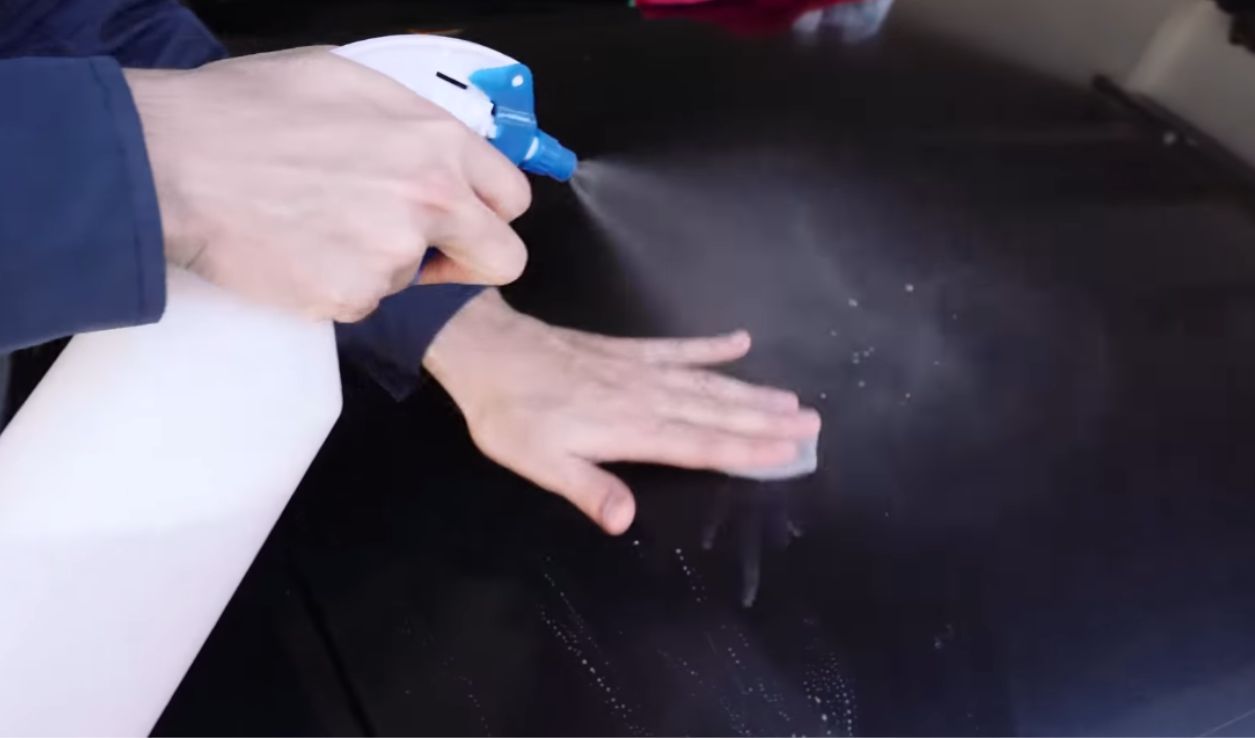
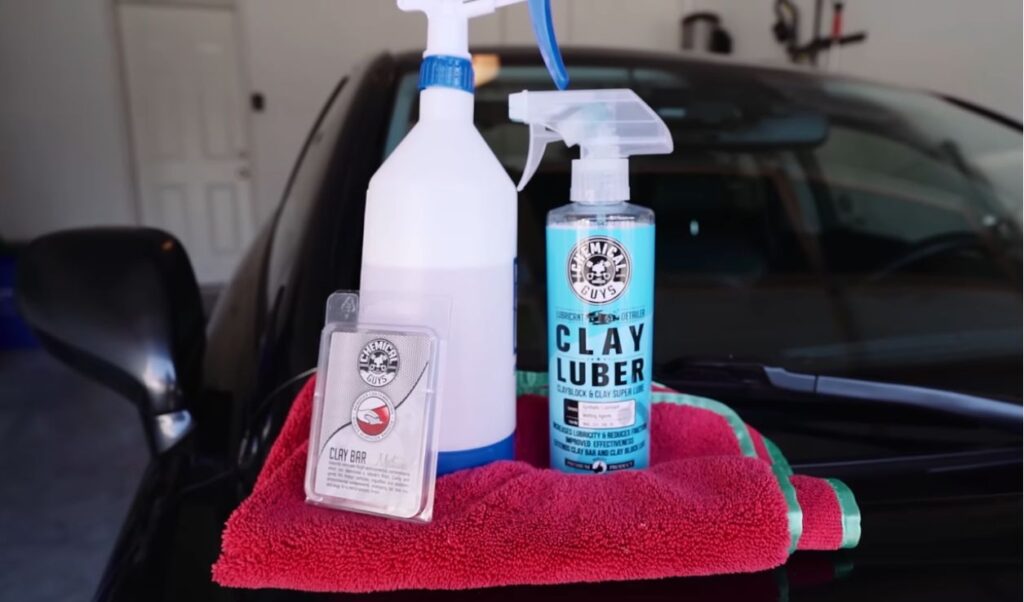
Next, spray a generous amount of clay bar lubricant (or a detail spray) onto a small section of your car’s paint. The lubricant is essential—it allows the clay bar to glide smoothly over the surface without sticking or causing scratches. Never use a clay bar on a dry surface!
Step 4: Glide the Clay Bar Over the Paint
Hold the clay bar in your hand and gently glide it over the lubricated area using back-and-forth motions. You don’t need to apply a lot of pressure; just let the clay do the work. You’ll feel the clay grab at first, which means it’s picking up contaminants. Keep going until the bar glides smoothly without resistance.
Step 5: Check the Clay Bar
After working a small section, check the clay bar. If it’s dirty, fold it in half and knead it to expose a clean surface, then continue. Never use a dirty clay bar, as it could scratch your paint.
Step 6: Wipe Off the Area
Once you’ve finished claying a section, wipe off the excess lubricant with a clean microfiber towel. This will reveal the smooth, clean surface underneath.
Step 7: Repeat as Necessary
Continue this process, section by section, until you’ve clayed the entire car. Don’t rush—taking your time ensures that every inch of your car’s paint gets the attention it needs.
Step 8: Wash and Wax
After claying, I like to give my car another quick wash to remove any residue left by the clay bar. Then, I apply a good coat of wax to protect the freshly cleaned paint. The wax seals in the smooth finish and adds a deep, glossy shine.
Using a clay bar for the first time can be a bit of a learning curve, but once you see the results, you’ll realize it’s well worth the effort. The key is to be patient and thorough, and to always use plenty of lubricant to prevent any damage to your car’s paint.
Top Clay Bars for Car Paint: Product Recommendations
Over the years, I’ve tried a number of different clay bars, and while they all serve the same basic purpose, some definitely stand out above the rest. Here are my top recommendations for anyone looking to try a clay bar for the first time, or for those looking to upgrade to a better product.
1. Meguiar’s Professional Detailing Clay
Meguiar’s is a trusted name in car care, and their Professional Detailing Clay is my go-to when I need a heavy-duty product. This clay bar is designed for experienced users because it’s a bit “grabby,” which means it can pull out even the most stubborn contaminants. It’s a bit pricier than some other options, but it’s worth it for the professional results you can achieve. I always keep this one on hand for those times when my car’s paint needs some serious attention.
2. Adam’s Polishes Clay Mitt
If you’re looking for something a bit more user-friendly, Adam’s Polishes Clay Mitt is a great alternative to a traditional clay bar. The mitt design makes it easier to hold and maneuver, especially if you’re working on larger areas. It’s a bit more expensive, but the convenience and speed it offers make it a solid investment. Plus, it comes with Adam’s fantastic detail spray, which is one of my favorites.
3. Griot’s Garage Paint Cleaning Clay
For those who want a more traditional clay bar experience, Griot’s Garage Paint Cleaning Clay is an excellent choice. It comes in a large quantity and is stored in a sealed container to keep it fresh between uses. I’ve found it to be a bit harder to work with compared to Meguiar’s, but it’s a good option for those on a budget. The lighter shade of the clay also makes it easier to see the contaminants you’re removing, which is a nice touch.
4. Mothers California Gold Clay Bar Kit
If you’re new to claying, the Mothers California Gold Clay Bar Kit is a great starter option. It includes everything you need to get started: two clay bars, a microfiber towel, and a bottle of detail spray. The clay is fine grade, making it safe for beginners, and it’s easy to knead and use. I started with this kit, and it’s a great way to see what clay bar detailing is all about without a huge investment.
Each of these products has its own strengths, so whether you’re a seasoned pro or a first-timer, there’s a clay bar out there that will suit your needs. The key is to choose a product that matches the condition of your car’s paint and your level of experience.
How Often Should You Use a Clay Bar?
One of the questions I get asked most often is how frequently you should use a clay barOne of the questions I get asked most often is how frequently you should use a clay bar on your car’s paint. The answer really depends on a few factors, including your driving habits, where you park, and the general environment your car is exposed to.
If you live in an area with a lot of industrial fallout, or if you frequently drive on highways or near railroads, your car’s paint is likely to collect more contaminants. In these cases, you might want to clay your car every three to six months. For those who drive less or live in cleaner environments, claying once or twice a year should suffice.
Personally, I make it a habit to clay my car at least twice a year—usually in the spring and fall. After a long winter, road salt and grime can really build up, so spring is the perfect time to refresh your car’s paint. Fall is also a good time because it prepares your car for the harsher winter months, ensuring the paint is protected.
One way to tell if your car needs claying is by running your hand over the paint after washing it. If it feels rough or bumpy, it’s time to break out the clay bar. Remember, using a clay bar too often isn’t necessary and could potentially wear down the clear coat over time. The key is to find the right balance based on your specific circumstances.
Common Mistakes to Avoid When Using a Clay Bar
Using a clay bar can do wonders for your car’s paint, but there are a few common mistakes that can lead to less-than-perfect results—or worse, damage your paint. Here are some of the pitfalls I’ve learned to avoid over the years.
1. Skipping the Wash
One of the biggest mistakes you can make is using a clay bar on a dirty car. Always wash and dry your car thoroughly before claying. If you don’t, you risk dragging dirt and debris across the paint, which can cause scratches.
2. Not Using Enough Lubricant
Clay bars need plenty of lubricant to glide smoothly over the paint. If you don’t use enough, the clay can stick, drag, and even leave behind marks. Always make sure the surface is well-lubricated before you start, and don’t be afraid to apply more as you go.
3. Using Too Much Pressure
It’s tempting to press harder, thinking it will remove more contaminants, but that’s a mistake. The clay bar should glide with light pressure; the weight of your hand is usually enough. Applying too much pressure can lead to marring or scratches.
4. Not Folding the Clay Bar
As you work, the clay bar will pick up contaminants. If you don’t regularly fold the clay to expose a clean surface, you’ll end up rubbing those contaminants back onto the paint, which can cause scratches. Make it a habit to check the clay frequently and fold it as needed.
5. Dropping the Clay Bar
If you drop the clay bar, it’s game over for that piece. It will pick up dirt and grit from the ground, and using it again could scratch your paint. Always knead and flatten a fresh piece of clay if you accidentally drop it.
By keeping these common mistakes in mind, you can ensure that your clay bar experience is a positive one, leaving your car’s paint smooth and ready for the next steps in your detailing routine.
FAQs About Clay Bars
When I first started using a clay bar, I had a lot of questions. Here are some of the most common ones I’ve encountered, along with the answers I’ve found helpful over the years.
1. Can a clay bar damage my car’s paint?
Used correctly, a clay bar is safe for your car’s paint. However, if you use it on a dirty car, skip the lubricant, or apply too much pressure, you could cause scratches or marring. Always follow the proper steps, and your paint will be safe.
2. Do I need to clay my car before waxing?
Yes, it’s a good idea to clay your car before applying wax. Claying removes the contaminants that can prevent wax from bonding to the paint. This ensures a smoother application and longer-lasting protection.
3. How do I know if my car needs claying?
After washing and drying your car, gently run your hand over the paint. If it feels rough or gritty, that’s a sign that contaminants are embedded in the surface, and it’s time to use a clay bar.
4. Can I reuse a clay bar?
You can reuse a clay bar until it becomes too dirty or starts to fall apart. The key is to fold the clay frequently to expose a clean surface. If the clay becomes overly contaminated or dried out, it’s time to replace it.
5. Is there an alternative to a clay bar?
Yes, there are alternatives like clay mitts, towels, and pads that serve the same purpose. These products are often more convenient to use and can be washed and reused, but they can be more expensive. It really comes down to personal preference and how often you plan to clay your car.