
As someone who loves cars and knows a lot about detailing, I’ve seen how paint correction before and after can completely change a car. It’s not just about making the car look good; it’s about bringing back its original beauty and keeping its value. Paint correction is a detailed process that can turn a car with scratches, swirl marks, and dull paint into a shiny masterpiece. In this article, I want to share what I know about paint correction before and after and show you the big changes it can bring. Whether you like to work on your car yourself or are thinking about getting professional help, this guide will help you understand paint correction before and after.
Understanding Paint Correction
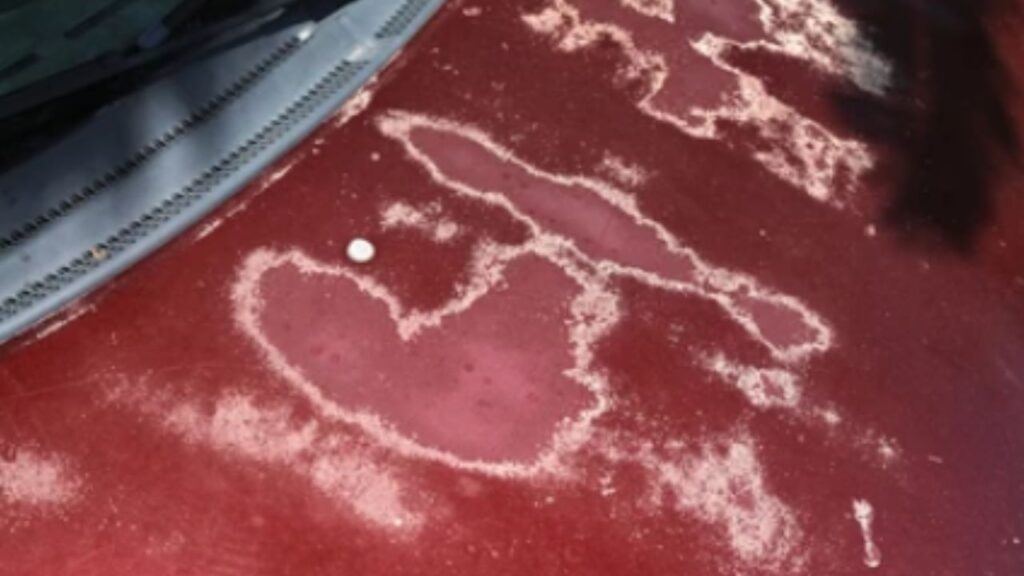
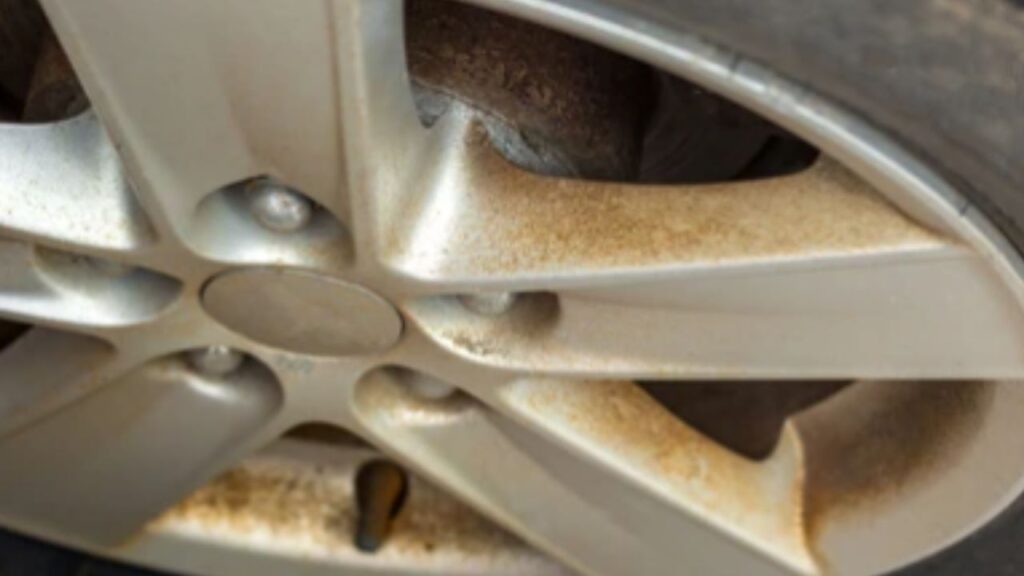
Paint correction is the process of removing imperfections from a car’s paint, making it look like new again. These imperfections can be things like swirl marks, fine scratches, oxidation, and water spots. Over time, even cars that are well taken care of can get these defects because of things like the weather and washing the car the wrong way. The goal of paint correction is to actually remove these blemishes, not just cover them up. This is different from a regular car wash or wax, which only cleans the surface or adds a temporary shine without fixing the underlying problems.
In my experience, paint correction before and after results are truly remarkable. When you see a car that has been properly corrected, the difference is like night and day. Swirl marks and scratches disappear, and the paint looks deep and glossy. The car doesn’t just look clean; it looks like it did when it was brand new. This process can bring a car back to life and add to its value.
The reason paint correction works so well is because it involves removing a small amount of the clear coat to get rid of the imperfections. This is done with special tools and products that polish the paint, smoothing out the surface. The result is a finish that is free of defects and has a brilliant shine. Whether you’re a car enthusiast who likes to do things yourself or someone who prefers to hire a professional, understanding the steps and benefits of paint correction can help you achieve amazing results.
In this article, I will walk you through the process of paint correction, show you some dramatic paint correction before and after transformations, and give you tips on how to maintain the results. Whether you’re looking to improve your car or just want to learn more about this fascinating process, you’ll find valuable information and insights here.
Initial Assessment Before Paint Correction
Before starting paint correction, it’s really important to check the car’s paint condition carefully. First, I always make sure to look at the car under good lighting. This helps me see any defects like swirl marks, scratches, and oxidation. It’s amazing how much more you can see with the right light.
Taking pictures of the car before you start is a great idea. These photos help you remember what the car looked like before and show how much better it looks after the paint correction. This paint correction before and after comparison is not just satisfying but also shows the real value of the work done.
By doing this initial assessment, you can spot all the areas that need fixing. It helps in planning how much work is required and what steps to take. This careful inspection makes sure that the paint correction process will be successful and that every problem area gets the attention it needs.
Preparation Steps Before Paint Correction
Proper preparation is key to getting the best results from paint correction. First, the car needs a good wash to remove all the dirt and grime. This step ensures that you start with a clean surface. Next, I use a clay bar to lift off any particles that are stuck to the paint and that washing alone can’t remove. This makes the surface smooth and ready for correction.
Another important step is to protect the car’s sensitive areas. I cover the rubber trims and plastic parts with masking tape. This prevents them from getting damaged during the paint correction process. These steps might seem small, but they are crucial for achieving the best paint correction before and after results.
By making sure the paint surface is clean and smooth, you create the perfect canvas for paint correction. This careful preparation sets the stage for the rest of the process, helping to achieve a flawless finish.
The Paint Correction Process
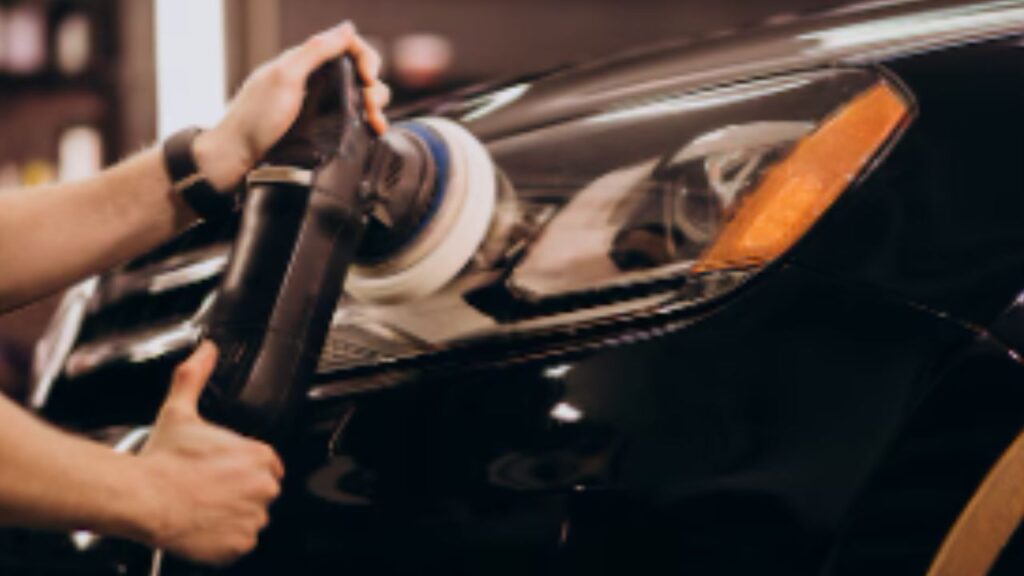
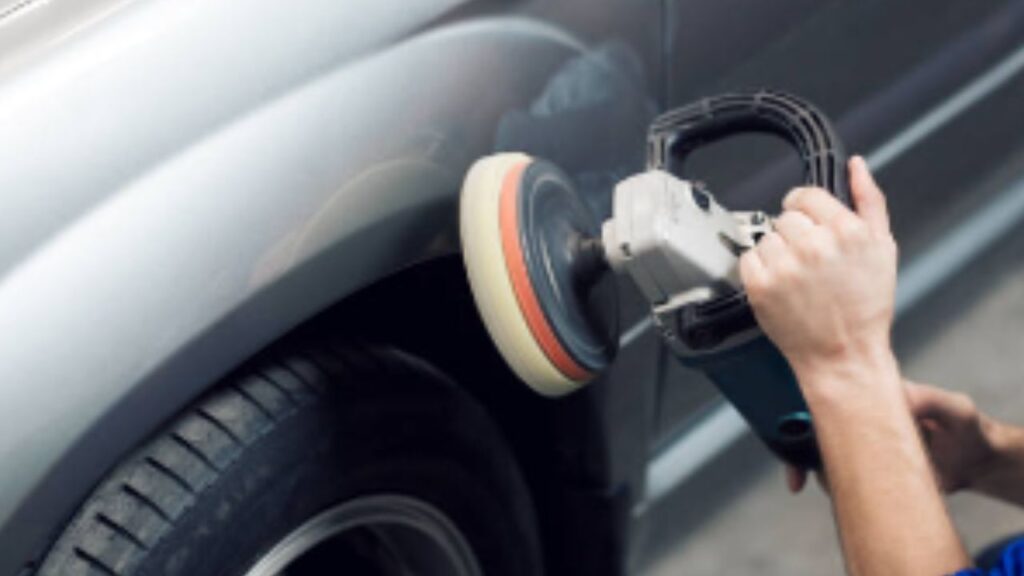
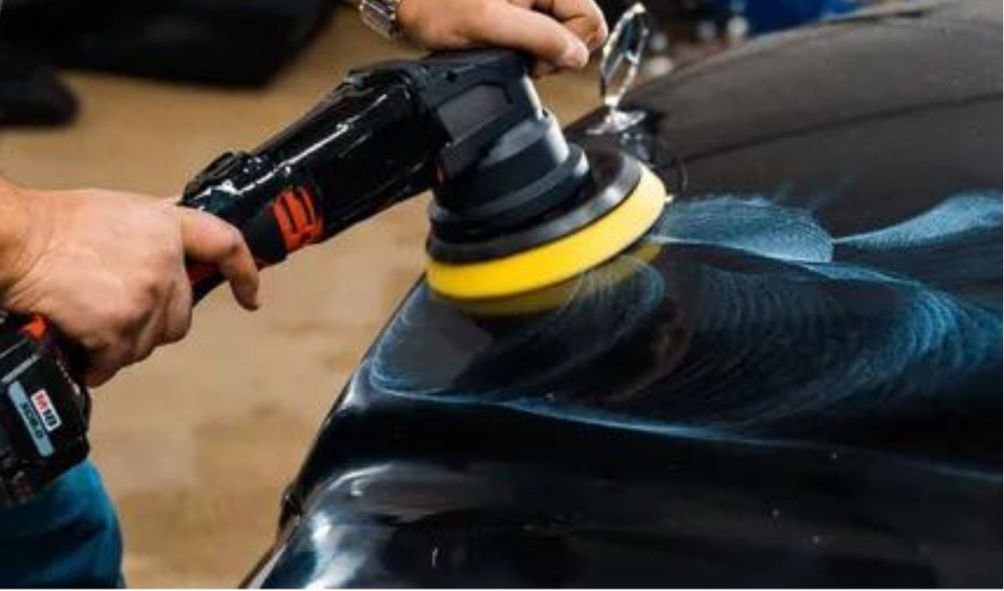
The paint correction process involves several important steps, each using specific tools and products. It usually starts with a step called compounding. In this step, I use a cutting compound and a machine polisher to remove deep imperfections like scratches and swirl marks. This is a crucial step in achieving impressive paint correction before and after results.
Next comes polishing. For this, I use finer abrasives to smooth out the paint surface and make it shine. Polishing helps to enhance the paint’s clarity and gloss. The goal is to refine the surface, making it look as good as new.
It’s essential to make sure the correction is uniform across the entire vehicle. This means carefully working on each section to ensure the finish is consistent and flawless. Every step needs to be done meticulously to remove defects gradually without damaging the clear coat.
By following these steps, we can achieve a stunning transformation, turning a dull, imperfect paint job into a shiny, flawless finish. This process highlights the true beauty of the paint correction before and after the difference.
Visual Comparisons: Before and After
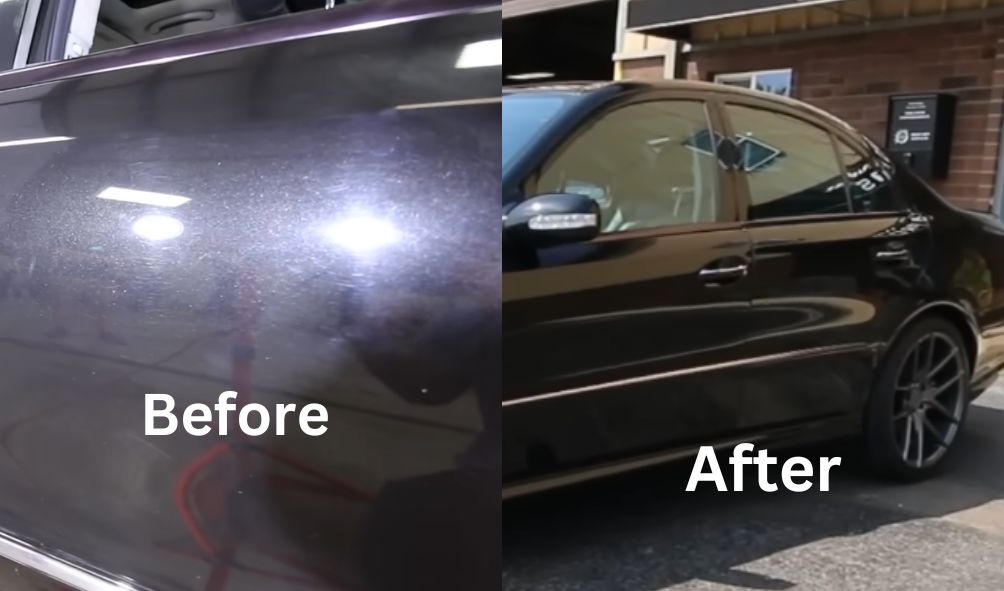
The best way to see how effective paint correction is by looking at before-and-after comparisons. For example, I once worked on an everyday sedan that had many swirl marks and scratches. After the paint correction, the difference was incredible. The paint went from dull and hazy to shiny and reflective, showing off the car’s original color and depth.
Another time, I worked on a high-end sports car that had oxidation and water spots. The paint correction made the car look even better than new. The finish was not only restored but enhanced, giving it a glossy, beautiful look.
These examples show the amazing changes you can see with paint correction before and after. They highlight how this process can dramatically improve a car’s appearance, making it look fresh and well-maintained.
Detailing the Results
The results of paint correction are amazing. This process makes the paint on your car look clear and shiny, almost like a mirror. It gets rid of imperfections like scratches and swirl marks, leaving the surface smooth and flawless. The car looks much newer and more vibrant, which is very satisfying.
Seeing the paint correction before and after can be really impressive. The car goes from looking old and worn out to looking fresh and well-maintained. This not only makes the car look great but also makes the owner feel proud. Knowing that your vehicle looks its best is a fantastic feeling, and it shows the true value of paint correction.
Impact on Car Value and Longevity
Paint correction can greatly improve a car’s value and how long its paint lasts. A car with perfect paint looks more appealing to buyers and can sell for a higher price. When you see the paint correction before and after, the difference is clear. A flawless paint job not only makes the car look good but also shows it has been well taken care of.
By removing defects and adding a protective layer, paint correction helps guard against future damage. This protection keeps the paint looking new for a longer time. This means you won’t need to repaint as often, saving money in the long run.
In my experience, investing in paint correction is worth it. It helps maintain the car’s appearance and value over time. Whether you plan to keep your car for years or sell it soon, paint correction makes a big difference.
Customer Testimonials and Feedback
Hearing from car owners shows how great paint correction can be. Many of my clients are amazed by the results. They often say their cars look even better than when they first bought them. The paint correction before and after transformations is truly impressive.
Clients often talk about the big improvements and the value of professional paint correction. Reviews and ratings show how happy they are with the changes. These stories highlight how important and effective paint correction is. It makes the car look its best, proving that the investment is worth it for anyone wanting their vehicle to shine.
DIY vs. Professional Paint Correction: Before and After
Some car enthusiasts like to do paint correction themselves. It can be fun and rewarding, but it also has challenges. To get results like a professional, you need skill, experience, and the right tools. DIY paint correction can be tricky, with risks like over-polishing or using the wrong products.
Professional services offer expertise and precision. Professionals have the experience and equipment to ensure a perfect finish. When you look at paint correction before and after results, the difference is often clear. Professionals usually achieve a higher quality finish, though some DIY results are impressive too.
From my experience, I’ve seen both DIY and professional paint corrections. While DIY can be satisfying and save money, it often doesn’t match the quality of professional work. Professional paint correction before and after results usually show a more even and refined finish. This makes professional services worth considering if you want the best outcome for your car.
Maintaining the Results Post-Correction
Keeping your car looking great after paint correction needs careful attention and regular care. Based on my experience and talks with many experts, here are some of the best ways to maintain the results.
Regular Washing and Care Tips
Regular washing is very important to keep the paint correction looking good. Always use the two-bucket method: one bucket for the soapy water and another for rinsing the wash mitt. This helps keep dirt from getting back onto the car’s surface, which can cause new scratches and swirl marks. Use a high-quality car shampoo that is pH-neutral and made for cars. Avoid automatic car washes because their brushes can damage the paint. Instead, wash your car by hand using soft microfiber mitts and towels.
Protective Coatings and Sealants
Applying a protective coating or sealant after paint correction adds an extra layer of defense against dirt and other contaminants. Ceramic coatings are highly recommended because they last a long time and repel water, which helps keep the car cleaner. Sealants are also good, though they don’t last as long as ceramic coatings. Both will protect the paint and keep it shiny. Applying wax or sealant every few months will help maintain this protective layer.
Periodic Inspections and Touch-ups
Regular inspections are crucial to find and fix any new problems early. Check your car every few weeks for new scratches, swirl marks, or signs of oxidation. Small touch-ups with the right products can fix minor issues before they get worse. This routine helps extend the life of the paint correction and keeps your car looking its best.
Maintaining the paint correction before and after results is all about consistent care and attention to detail. By following these tips, you can keep your car looking fresh and well-maintained for a long time.
Common Mistakes to Avoid During Paint Correction
Even with the best intentions, mistakes can happen during paint correction. Here are some common pitfalls and how to avoid them, based on my experience and insights from experts.
Over-polishing Issues
Over-polishing can thin out the clear coat, which protects the paint. This weakens the paint’s durability. It’s important to use the right level of abrasiveness and watch your progress carefully. When polishing, remember that less is often more. Aim to remove only the necessary amount of clear coat to get rid of imperfections. Seeing paint correction before and after results helps to understand the right balance.
Incorrect Product Use
Using the wrong or low-quality products can harm your car’s paint. Always choose high-quality, automotive-grade products made for paint correction. Avoid household products or anything not designed for car paint, as they can cause damage.
Safety Precautions and Best Practices
Safety is very important during paint correction. Always work in a well-ventilated area to avoid inhaling harmful fumes. Wear protective gear like gloves and eye protection. Follow the manufacturer’s instructions for all products and tools. Never rush the process. Taking your time ensures better results and reduces the risk of mistakes.
By being mindful of these common mistakes, you can achieve the best paint correction before and after results, ensuring your car looks great and stays protected.
Visual Gallery: Paint Correction Transformations
A visual gallery is a great way to see the amazing changes that paint correction can make. High-quality before-and-after photos show just how effective the process is. You can easily see the difference between the old, damaged paint and the new, shiny finish. These pictures highlight the paint correction before and after results.
Videos are also very helpful. They can show the whole process, from the first look at the car’s condition to the final polishing. This helps you understand all the detailed work that goes into paint correction.
Interactive comparisons are another great tool. They let you see the differences side-by-side, making the improvements easy to notice. These visual aids make it clear just how much paint correction can improve a car’s appearance. From my experience, these galleries and videos are very satisfying to watch and really show the value of paint correction.
Conclusion
In summary, paint correction can greatly improve how a car looks and increase its value. By following the best practices for maintaining the results, you can keep your car in excellent condition for years. The value of paint correction comes from both the immediate visual improvement and the long-term protection of your car’s paint.
I’ve seen the amazing changes myself—paint correction before and after can make a car look brand new. If you haven’t tried it yet, consider paint correction for your car. You’ll be amazed at the difference it can make.
Frequently Asked Questions (FAQ)
What is paint correction before and after?
Paint correction before and after shows the difference in a car’s paint condition before and after the correction process. It highlights how the paint is improved by removing scratches, swirl marks, and other imperfections.
What imperfections can paint correction fix?
Paint correction can fix scratches, swirl marks, oxidation, water spots, and marks from bird droppings or tree sap. It makes the paint smooth and shiny again.
How can I see the impact of paint correction?
The best way to see the impact is through before-and-after photos. These photos show how much the paint improves after the correction process.
How long does paint correction take?
The time needed for paint correction varies based on the car’s condition and size. It can take a few hours to a couple of days. A detailed inspection before starting will give a better time estimate.
How much does paint correction cost?
The cost of paint correction depends on the car’s condition, size, and the detailer’s skill. It usually ranges from a few hundred to over a thousand dollars. This cost is often worth it for the improvement in appearance and value.
Can I do the paint correction myself?
Yes, you can do paint correction yourself, but getting professional results requires skill, experience, and the right tools. DIY can be satisfying but risky if not done correctly. Professionals usually get better, more consistent results.
How do I maintain the results of paint correction?
To keep the paint looking good, regularly wash your car with the two-bucket method, use protective coatings like wax or ceramic coatings, and avoid automatic car washes. Check for and fix small issues regularly.
What are the risks of DIY paint correction?
DIY paint correction risks include over-polishing, which can thin the clear coat, and using the wrong products, which can damage the paint. Use high-quality products and follow best practices to avoid these issues.
How does paint correction before and after affect the car’s resale value?
Paint correction can increase a car’s resale value by improving its appearance. A car that looks well-maintained is more appealing to buyers.
What are common mistakes to avoid during paint correction?
Common mistakes include using too much pressure, not using the right polish, and not cleaning the car well before starting. These can cause uneven results or damage the paint. Follow a careful, step-by-step approach to get the best results.