
Have you ever wondered why your car’s paint doesn’t look as shiny as it once did, even after frequent washes? What if there was a way to bring back that showroom shine and keep it looking great for years? The solution might be 2 step paint correction—a process that goes beyond regular washing and waxing.
Here’s the big question: Is it worth spending time and money on 2 step paint correction when a simpler 1 step process is available? Can breaking it into two steps—cutting and polishing—really make a difference?
In this blog post, we’ll explore how 2 step paint correction can enhance your car’s look and protect its finish. Whether you’re a car enthusiast seeking a perfect finish or just curious about better car care, we’ll explain why 2 step correction might be the key to your car’s best appearance. Keep reading to find out if this detailed method is right for your vehicle.
What is 2 Step Paint Correction?
2 step paint correction is a process that makes your car’s paint look shiny and clear. It has two stages, and each stage does something different to improve your car’s paint. Together, these steps give better results than a 1 step correction.
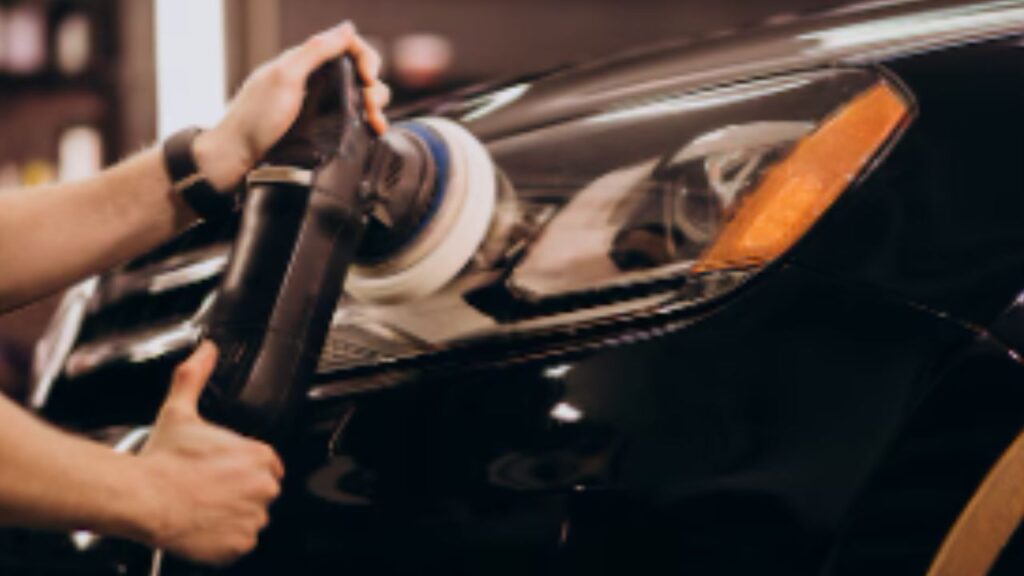
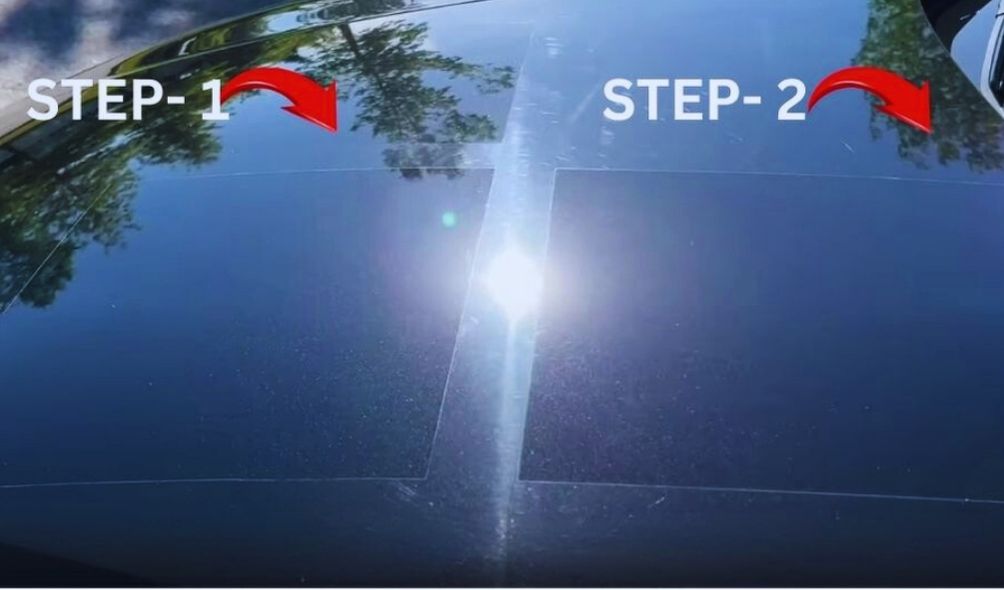
Step 1: The Cutting Stage
The first step is called cutting. This part uses a machine polisher, a cutting pad, and a special compound to remove scratches, swirl marks, and other problems on the paint. It’s like when you sand wood to make it smooth. The cutting removes a thin layer of the paint’s clear coat, showing a fresh, clean surface underneath.
This step is important, especially for cars with a lot of scratches or dull paint. If your car looks scratched or worn, cutting fixes the big problems.
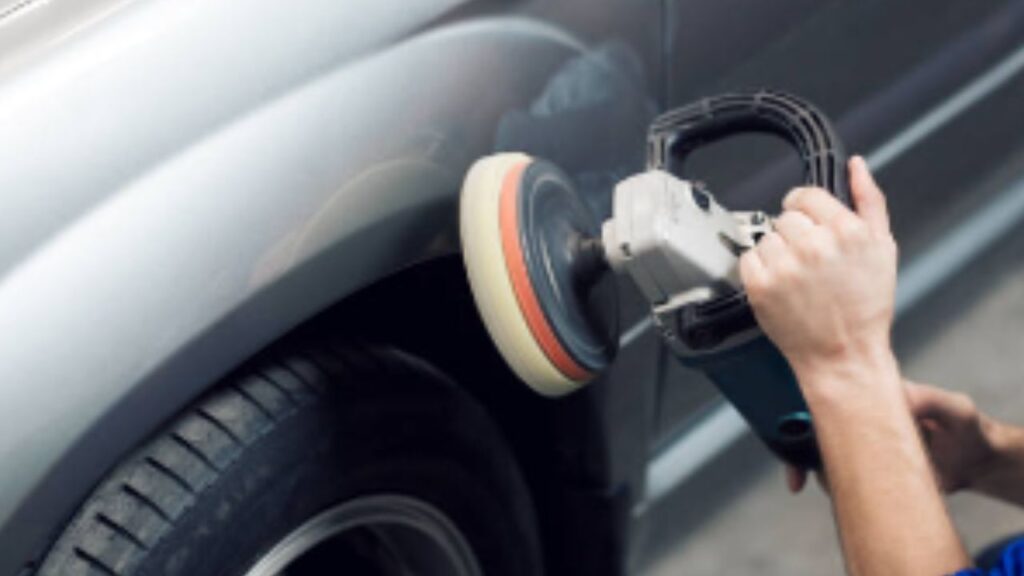
Step 2: The Polishing Stage
After cutting, the next step is polishing. This is where the paint starts to shine. Polishing removes any small marks left from cutting and makes the paint glossy and smooth. This step uses softer pads and finer compounds to make the car look its best.
Polishing doesn’t just make the paint look good—it also prepares the surface for long-lasting protection. After polishing, you can seal the paint with wax or a ceramic coating to keep it safe.
Why Choose 2 Step Correction Over 1 Step?
2 step correction is more thorough than 1 step correction. The 1 step process mixes cutting and polishing together. But it’s not enough for cars with a lot of damage. If your car is older or has been through tough conditions, 2 step correction gives better results.
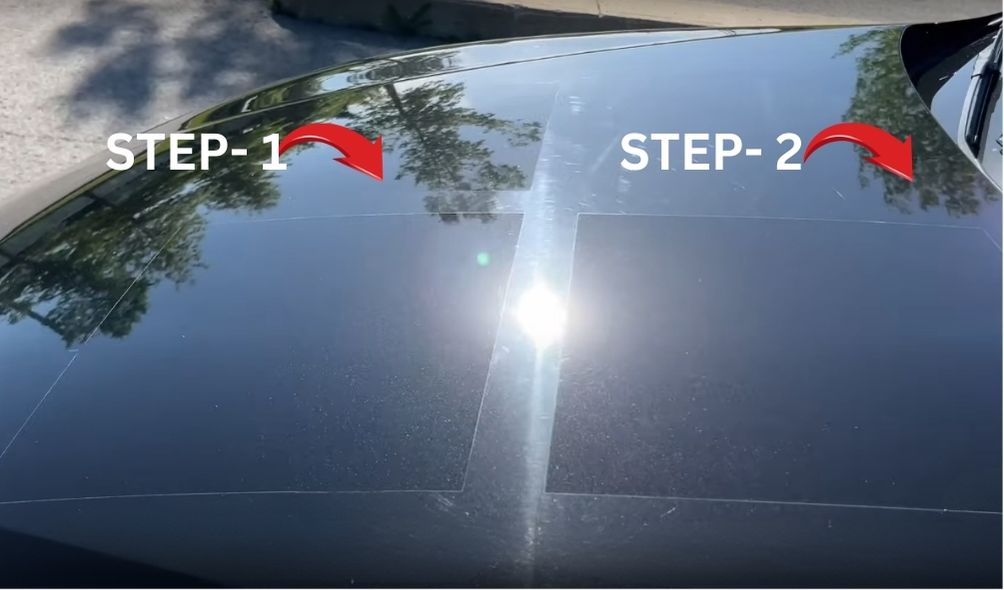
The 2 Step Paint Correction Process: Step-by-Step Guide
Let’s walk through the 2 step paint correction process. This way, you’ll know what to do if you want to try it yourself or understand what to expect if a pro handles it for you.
Step 1: Preparation
Before you begin, preparation is very important. Skipping this part can ruin your results.
- Wash the Car: Start with a good wash using car soap and a foam cannon. This removes dirt and grime from the surface.
- Clean the Paint: After washing, use a clay bar to remove things like tar, tree sap, and other dirt that washing doesn’t clean.
- Check the Paint: Look closely at the paint to find scratches, swirl marks, or dull areas. You can also use a tool to check the thickness of the paint to avoid cutting too deep.
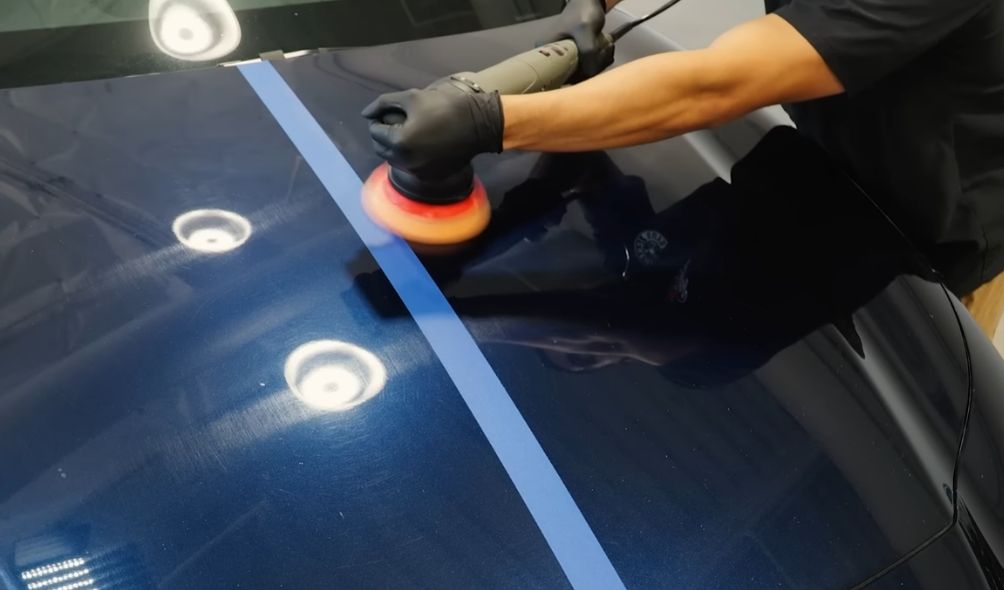
Step 2: Cutting
Once the car is clean, it’s time for the cutting stage. This is where the hard work begins.
- Pick the Right Tools: You need a machine polisher, cutting pads, and a cutting compound. Different pads and compounds work better for different levels of damage, so choose based on how bad the paint looks.
- Work in Small Sections: Don’t try to cut the entire panel at once. Focus on small areas, apply the cutting compound, and move the machine in overlapping patterns.
- Be Careful: Cutting removes a thin layer of the clear coat. Too much cutting can damage the paint, so start with a mild pad and compound. Always test on a small area first.
- Inspect as You Go: After each section, wipe the area with a cloth and check the paint. If needed, repeat the process, but be careful not to remove too much clear coat.
Step 3: Polishing
After cutting, the car will look better, but it won’t have that deep shine yet. That’s where polishing comes in.
- Switch to a Polishing Pad: Use a polishing pad and a fine polishing compound. This will bring out the shine.
- Refine the Surface: Like cutting, work in small sections and use overlapping motions. Polishing is easier than cutting, but stay consistent.
- Inspect and Repeat: After each section, check the paint to see if it’s smooth and glossy. You may need to polish a few times to get the perfect shine.
Step 4: Protect the Paint
After you’re done cutting and polishing, it’s time to protect your work.
- Wipe the Surface: Use a microfiber cloth to clean off any leftover compound.
- Apply Protection: Use a sealant or ceramic coating to protect the paint. This keeps your car looking good and safe from the elements.
The whole process can take 10 to 24 hours, depending on how experienced you are and how bad the paint is. But trust me, it’s worth it!
1 Step vs 2 Step Paint Correction: What’s the Difference?
Now that we’ve explained the 2 step process, let’s compare 1 step and 2 step paint correction. You might ask, “Why not choose the faster option?” It depends on your car’s condition and the results you want.
1 Step Paint Correction
1 step correction combines cutting and polishing into one step. It’s faster and costs less than 2 step correction, but it’s not as complete. If your car has only small flaws, this could be enough.
For example, if your car’s paint looks good but has a few light swirls or small marks, 1 step correction can make it look better without taking much time. But if your car has deep scratches or paint damage, 1 step correction won’t be enough.
2 Step Paint Correction
2 step paint correction is more thorough. It splits the process into two stages—cutting and polishing. This allows for deeper correction and a better finish. Yes, it takes more time and costs more, but the results last longer, especially if you protect the paint with a sealant or ceramic coating.
Time, Cost, and Results
- Time: 1 step is faster and can take just a few hours. 2 step correction can take up to 24 hours.
- Cost: 2 step correction costs more due to the extra time and materials. You could pay between $500 and $1,500 for a professional job.
- Results: 1 step correction will improve how your paint looks, but 2 step correction gives a high-gloss, showroom finish.
Which One Should You Choose?
If your car is newer and only has small paint problems, 1 step correction may be all you need. But if your car is older or has been through rough weather and has more paint damage, 2 step paint correction is a better choice.
Benefits of 2 Step Paint Correction
Here are the top reasons to invest time and money in 2 step paint correction:
Better Results
The cutting and polishing steps make your car’s paint look almost new. This process removes deep and surface-level defects, giving the paint a clear and shiny finish that a 1 step process can’t match. If you want your car to look like it just left the showroom, 2 step correction is the best choice.
Long-Term Protection
After cutting and polishing, your car’s paint is ready for long-lasting protection. Whether you choose wax, sealant, or ceramic coating, your paint will stay safe from UV rays, dirt, and other harmful things. This means fewer touch-ups and less maintenance in the future.
Increases Resale Value
Corrected paint can make your car worth more if you sell it later. Buyers will pay more for a car that looks well-maintained. A shiny, smooth exterior is the first thing people see, so it’s important to have your car looking its best.
Works on All Paint Colors
2 step correction works great on all paint colors. It’s especially useful on dark colors like black, which show more scratches and swirl marks. The cutting stage removes these marks, and the polishing stage makes the color rich and shiny.
In short, 2 step paint correction is worth the cost and time if you want long-lasting, almost-perfect results, especially for cars that need extra care.
Tools and Products Needed for 2 Step Paint Correction
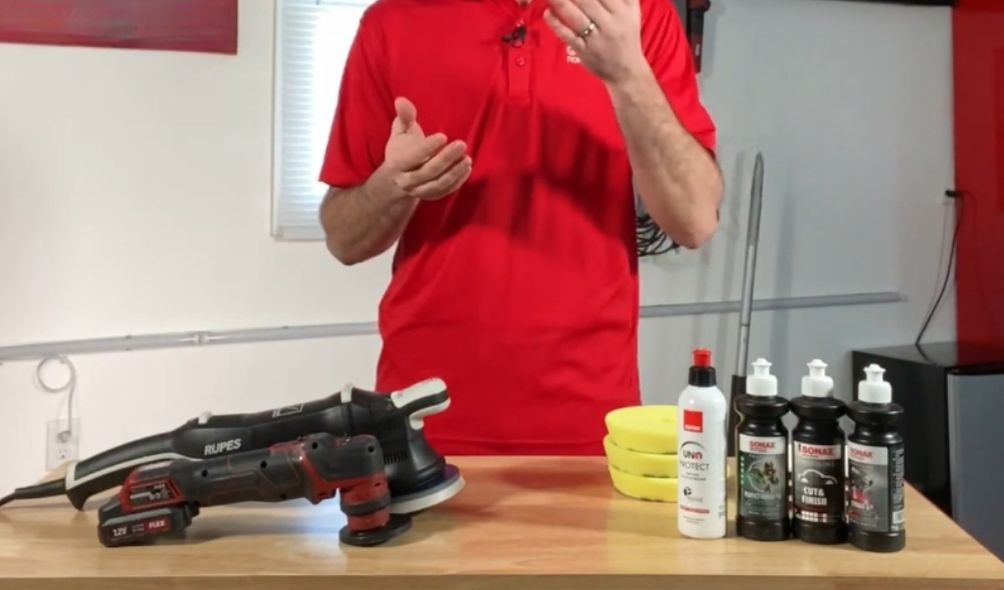
If you love doing things yourself, here’s what you need for 2-step paint correction. You don’t need fancy tools like the pros, but with the right DIY gear, you can still get great results.
Essential Tools
Polisher: A machine polisher is key. A dual-action polisher is best for beginners because it’s easy to use and less likely to harm the car. Good brands include Porter-Cable and Griot’s Garage.
Cutting Pads: You’ll need foam or microfiber pads for the first step. These remove deep scratches and marks.
Polishing Pads: For the second step, use softer polishing pads to smooth the surface and make it shine.
Microfiber Towels: You’ll need plenty of these to wipe down the car after each step.
Cutting Compounds
Meguiar’s M105 Ultra-Cut Compound: This is a top choice for removing deep scratches and oxidation. It’s popular with both pros and DIYers.
3D One Hybrid Cutting Compound: This product is versatile. Depending on the pad you use, it can both cut and finish.
Polishing Compounds
Meguiar’s M205 Ultra Finishing Polish: This is the go-to polish. It removes fine marks and leaves a glossy finish.
Menzerna Super Finish: Another great product for a smooth, mirror-like finish.
Protection Products
Sealants: Chemical Guys JetSeal is a good choice for protection and a shiny finish after paint correction.
Ceramic Coatings: C-quartz ceramic coating is a long-lasting option. It protects your car from damage for months, even years.
DIY vs. Professional Gear
You can get good results with DIY tools, but professionals often use advanced gear like rotary polishers. If you’re starting out, stick with dual-action polishers—they’re safer and easier to use.
How Long Does 2 Step Paint Correction Take?
One of the most common questions I hear is, “How long does 2 step paint correction take?” The answer depends on a few factors, including the size of your vehicle, the condition of the paint, and your level of experience.
- Washing and Decontamination: Plan for about 1 to 2 hours for this step. You need to make sure the car is completely clean before moving on to the cutting stage.
- Cutting Stage: Depending on the severity of the paint defects and the size of your vehicle, this can take anywhere from 4 to 8 hours.
- Polishing Stage: This stage usually takes less time than cutting, but still requires a thorough approach. Expect it to take around 3 to 5 hours.
- Applying Protection: Whether you’re applying a sealant or ceramic coating, this step typically takes an additional 1 to 2 hours, depending on the product and how much curing time is needed.
In total, you’re looking at anywhere from 10 to 24 hours for a complete 2 step paint correction. It’s a time-consuming process, but the results are worth it.
Common Mistakes to Avoid with 2 Step Paint Correction
2-step paint correction is simple, but some mistakes can ruin your results. Here are some mistakes to avoid:
Over-Cutting
Compounding too much can thin the paint, which is a big mistake. Each time you compound, you remove part of the clear coat. If you remove too much, the paint becomes weak and future corrections won’t work. Always use a paint thickness gauge to check how much clear coat you’re taking off.
Ignoring Paint Thickness
It’s very important to measure the paint thickness before you start. If you don’t know how thick or thin the clear coat is, you’re working blind. Cars that have been repainted or corrected before may have thinner clear coats, so be extra careful.
Using the Wrong Pads or Compounds
Not all pads and compounds are the same. If you use a strong cutting pad with a fine polishing compound, or the other way around, your results won’t be good. Make sure to use the right pad and compound for each step.
Skipping the Prep Stage
As I said before, prep is key. If you skip washing or decontaminating the car, dirt will stay on the surface. When you start polishing, the dirt will scratch the paint even more.
How Much Does 2 Step Paint Correction Cost?
If you hire a professional for 2-step paint correction, the cost varies based on your location, vehicle size, and paint condition. On average, expect to pay between $500 and $1,500 for this service.
DIY Cost Breakdown
If you choose to do it yourself, here’s a rough cost estimate:
- Machine Polisher: $100–$300
- Cutting and Polishing Pads: $20–$50 per set
- Cutting Compound: $30–$50
- Polishing Compound: $20–$40
- Sealant or Ceramic Coating: $50–$150
- Microfiber Towels: $20–$30
For a DIY project, you’ll spend about $300 to $600 on supplies. It’s a bit of an investment, but doing it yourself can be satisfying. Plus, you can reuse your tools for future projects.
In Conclusion
if you want your car to shine and stay looking new, 2 step paint correction is a great option. It cleans and polishes better than a 1 step process. It’s especially useful for cars with more noticeable paint issues.
Here’s what to do next:
- Check Your Car’s Condition: Look at your car’s paint. If it has deep scratches or looks dull, 2 step paint correction is a good choice. For minor issues, a 1 step process might be enough.
- Get Your Tools: If you’re doing it yourself, you’ll need a machine polisher, cutting and polishing pads, cutting and polishing compounds, and a sealant or ceramic coating. If you hire a professional, compare local services and prices.
- Follow the Steps: Start with cutting to fix defects, then polish for a smooth, shiny finish. Make sure to wash and clean the car before starting.
- Protect the Paint: After correcting and polishing, apply a protective layer like wax, sealant, or ceramic coating. This helps keep the paint looking good.
- Share Your Results: If you’ve used 2 step paint correction, tell others about your experience. Your feedback can help others decide if this method is right for them.
By taking these steps, you can give your car a fresh, showroom-quality look. Whether you choose to do it yourself or hire a professional, 2 step paint correction can make a big difference.
Frequently Asked Questions
What is 2 step paint correction and how does it work?
2 step paint correction is a way to fix your car’s paint. It uses two steps. In the first step, a rough polish removes scratches, swirls, and other marks. The second step uses a smoother polish to make the paint shiny and smooth.
Is 2 step paint correction better than 1 step?
Yes, 2 step paint correction works better than 1 step. It removes more marks and makes the paint shinier. But 1 step is faster and costs less. It’s good for cars with light marks or if you don’t need full correction.
How long does 2 step paint correction take?
It usually takes 6 to 12 hours. The time depends on the size of the car, the paint’s condition, and how much work is needed. If the paint has a lot of damage, it may take longer.
How much does 2 step paint correction typically cost?
It costs between $500 and $1,500. The cost depends on the size of the car, how bad the paint is, and how skilled the detailer is. Some shops charge more for high-end services.
Can 2 step paint correction remove deep scratches and swirls?
Yes, it can fix most scratches and swirls. But if the scratches are deep and go through the clear coat, they may need extra work or repainting.